Monday, April 25, 2011

The Tourist

I took this past weekend off from blogging.  That meant no making a tutorial, no posting, no linky parties, and hardest of all...no visiting.  I needed a couple of days to refresh and I think it worked!  While sitting at my sewing machine I had a bit of an epiphany.

I only started blogging 8 months ago, but during that time I've crafted something every single week, sometimes more than one thing.  Funny thing is though, as much as I love crafting, it's not my passion.  What I really get a kick out of is sewing and everything related to it.  That means fashion, trends, colour, fabric, etc.  Somehow I got away from that. 

So, starting today I'm going to reconnect with my sewing machine and begin to write more often about sewing projects, patterns, tools, inspiration, whatever.  I'll still craft, but you can expect to hopefully see a bit more variety in what I show you.

So, to kick it all off I wanted to share some images that got me off the couch and behind my sewing machine.

I have to admit that I'm a sucker for Angelina Jolie movies.  I can't help it.  I like her style, her beauty, and even her acting.

This weekend I watched The Tourist .  I don't think it did outstanding in terms of reviews but no one can deny that the wardrobe, make-up, and scenery weren't to die for.


Watching Jolie strut around in perfectly fitted dresses, gowns, and wraps, inspired me to complete a project or two of my own (one of which I'll show you on Wednesday).

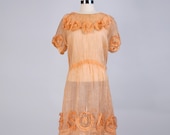
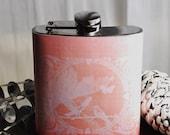
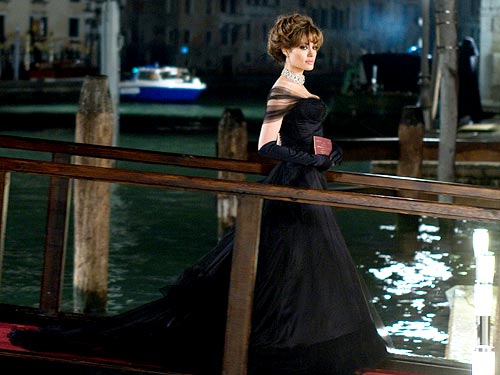
This is probably the prettiest dress she wears:


I love that splash of coral that just streams behind her as she saunters down the streets.

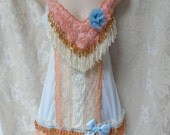
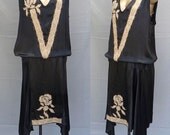
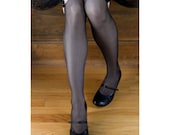
And any excuse to show a beautiful bias cut evening gown is good enough for me...even if it is in white.


So classic!

I think I need to rethink my black suit..

Source

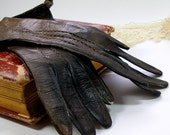
And the rest of my work attire...

Angelina Jolie Charles James dress for The Tourist
Source
And I will leave you with this

Source

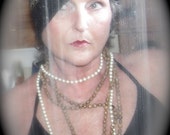
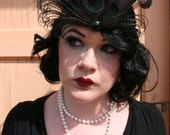
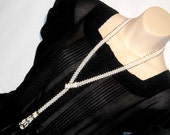
I'm not sure what I like best about this look, the gown, the make-up, the hair, the diamond choker????  Who knows, but if I ever fell into a life that let me wear something like that I sure wouldn't mind~

I know what you're thinking, this isn't 70's inspired.  You can't wear this to the disco or the music festival in the park!  Why on earth would Tamara like this?  Let's just say I'm a woman of many moods.

What do you think?  Do you have different styles for different parts of your life?  Have you seen the movie?  Did you like it?  or did you just like looking at it?  There actually aren't all that many wardrobe changes in this movie, but I think every one of them has huge impact.

Leave a comment and share your thoughts~

Thursday, April 21, 2011

Inspiration Shot: Tiger Lily

After a little fact checking before I posted this, I slammed into the harsh reality that all my life I've been under the mistaken idea that the Tiger Lily was the official flower of Saskatchewan.  How could I have been so mislead!  The official flower is actually the Western Red Lily, not the one shown below~


In any case, I've been in a very orangarama mood this week, so I still love how this flower yells out from all of the greenery "Look at me!!"".  The petals are so smooth and such a lovely shade.  But watch out for the insides, they'll make a real mess if you happen to brush up next to it. 

This is one of the few flowers that I've managed to keep alive in my garden.  I can't wait to see what comes up this year!


Wednesday, April 20, 2011

Show and Tell: Birthday Banner

Remember the Glittery Tissue Flowers I showed you on Friday?  Well, they were part of a bigger project I was doing for a surprise birthday party for my mom.


Actually, we all ended up surprised.  The plan was to call her at home once everyone had arrived (some people in my family are notoriously late so we didn't want to set a specific time for her to come in case half the guests hadn't arrived yet).  I was to tell her that I was locked out of my house and needed her to bring her extra key to let me in.  Imagine our shock when she wasn't home!  And her cell phone was turned off so we couldn't track her down!

Eventually someone found her and sent her our way but, we were just as surprised as she was when she came walking in the door.  It was all very funny.

Anyway, back to crafts...I meant to take loads of pictures to show you the decor and the food, but of course, I got all caught up in the party and forgot to use my camera very much.  So, to make up for it I thought I'd do a quick bonus tutorial on how I made the banner...without the use of a Cricut.  ( I do this in the hopes that someone from Cricut will notice and feel sorry for me and send me a Cricut machine to review and demonstrate.  Yes, I continue to live in Cricut dreamland.  Sigh~)

Here are the supplies I used:
Plus access to a computer and printer
I ended up not needing my scalloped scissors because I remembered at the last minute that I had a wave blade for my rotary cutter I could use, which was sooooo much faster.

Steps:
1) Using 12 X 12 scrapbooking paper, mark the 6"mark on one side. (I totally lucked out and found super pretty paper at the dollar store- 1 package of 10 different coordinating papers for $1!!)

2) If you're using scissors, lightly draw a line connecting your dot to each corner above and cut along the line.  If you're using a rotary cutter you can just go ahead and cut to the corners.


3) Once you have enough triangles to spell out whatever it is you want to say, then cut 1/2" strips of white paper with either a wavy blade rotary cutter or a scalloped edge scissor.


4) Glue your white strips of paper to the long sides of your triangles.  Snip along the top edge to make even and gently round the point to create an even wave. 


 When you flip your triangle over, the white paper should look like rick rack.


5) In a word processing program on your computer, type out each letter of your message at size 450.  Cut out the letters, using a sharp blade to cut any inside edges.


6) And here's where I stopped taking pictures because halfway through making this I reminded myself that I wasn't going to do a tutorial on it.  Sometimes I just take photos of my projects as I'm making them as a habit now.

The rest is easy though.  Just center each letter on a triangle and glue down.  Then glue along the long unfinished edge of the triangle and lay down some pretty ribbon.


And there you have it.  A super pretty, and in my case, somewhat shabby chic, Happy Birthday Banner.


Don't tell anyone but it was pretty easy to do, even without a Cricut.

Check out the linky party page for new additions!

Tuesday, April 19, 2011

Hidden Treasures: 1920's

If you're not part of the Etsy community (yet), you're missing out on an incredible place that is totally committed to the art of the handmade.  It's a wonderful place to find everything you need, or just want, while supporting fellow crafters and artists.  It's also just a treasure trove of  great ideas and inspiration.

I'm posting a treasury of various Etsy sellers each week.  Click on the thumbnail to visit the shops and see what else you can find.  And while you're hanging out at Etsy you can feel free to visit me at the Etcetorize etsy shop~

'Step Back in Time: 1920's' by Etcetorize

Everything you need for a night out...in the 1920's

Vintage, Original, ear...

$116.00
vintage dress- 1920'...

$175.00
Silver Ox Plated Art De...

$2.10
1928 Graduation Flapper...

$92.00
Ornate Pink Bird Patter...

$18.00
1920s Antique leather g...

$16.50
UNIQUE 1920'S VINTA...

$44.99
Gigi - 1920s Flapper - ...

$55.00
SALE -- sale -- Vintage...

$399.00
Swarovski Crystal Pearl...

$10.00
1920s Vintage Reproduct...

$80.00
IN REPOSE - Roaring 20&...

$75.00
set 5 Boxed Coco Chane...

$25.00
vintage woven seed bead...

$18.00
SALE Risque Flapper - V...

$20.00
Black and White Flapper...

$7.00


Monday, April 18, 2011

Follow My Friends: Addicted 2 Decorating

It's time for me to introduce you to another one of my new friends in the blog world.


I met Kristi through her brand new linky party on her blog Addicted 2 Decorating .  Not only does she host this great home decorating linky party but she also has some amazing ideas on DIY lighting projects!


DIY Project--How to make a vintage world globe pendant lightDIY Project--How to make a contemporary drinking straw pendant light    DIY Project--How to make a paper pulp egg carton flower pendant light  


Make sure to look for the fun home decor and accessory tutorials too!

DIY Project, How to make a hand painted floor clothDIY Project, How to make a footed bowl from lighting components   DIY Project, Sunburst mirror made with wood shims  

The list actually goes on and on.  Kristi has great before and after's, window treatment projects, wall treatments, and even full room makeovers!  And there's a whole section of inspiration files that are sure to get your imagination going.

Before


After
Master bedroom makeover--drapery panel, natural woven shades, diamond-tufted upholstered headboard, bedside chandelier, painted nightstand.

There's also great decorating articles and even personalized decorating help .  So, check out Addicted 2 Decorating and say hello to Kristi.  Don't forget to come back here and leave a comment letting everyone know what you found~

If you'd like to be featured, all you have to do is be a follower and link up your
blog on the "Follow My Friends" tab up top.  Each month I'll randomly feature at least one of you.

Have a great week everyone!

Linkwithin

Related Posts Plugin for WordPress, Blogger...