Friday, March 30, 2012

Scrapbuster Bracelet

Have you ever had one of those weeks where you feel like you just can't get it together?  That's how this week felt to me.  I just couldn't seem to get ahead.  So, today's craft is beyond simple and is just something fun to help you use up some of those scraps you have piling up in your craft closet.
This is all you need:

You could get more fancy pants and add beads or trinkets if you want but, like I said, this is not a fancy pants week for me~

Steps:
1) Using cotton fabric, make a small cut about a half inch in from the side and then tear.  It's OK, just go ahead and rip, and if it goes crooked and swings off the side, just do it again until you get a strip of fabric at least 5 inches long.

 Cotton is a natural fabric so you can tear it and it will naturally follow the grainline. Even if it appears crooked, this is actually the straight line of the fabric.  I like the rough edge you get from tearing for this project.


2) Cut one or more strips of fabric that wrap about 80% around your wrist.  You don't want the ends to meet.

3) Now cut some leather and/or suede lacing the same length as your fabric piece.


4) Cut another piece of leather about 4-5 inches long and tie one around all of the fabric and leather pieces.  Do the same thing on the other side.


5) Now tie your two laces together using what I call a sliding knot, but I think what everybody else out there calls a Double Fisherman's Knot.
Source

This is a great knot to know in case you don't want to use a jewellery clasp or you happen to run out of jewellery clasps and don't feel like making a midnight run to Michael's. 

And there you have it!  A cute little hippie dippie scrapbusting bracelet.  Obviously this is the kind of thing I wear on vacation, not to the office.  It would be fun for kids to make too.  Hmmm, wait a minute, what does that say about my sense of style???


Anyway, this is how fabulous my wrist would look if I were going to punch someone in the head....not that I would ever do that.....but my hand sort of looks like it there doesn't it?

I made another one in about 2 minutes flat with more strips of fabric.  I think I like this one better.

DIY jewellery, how to make a fabric bracelet, how to make your own jewellery, scrapbuster

I think this is the kind of thing that Steven Tyler might wear.  Maybe I should send him one and see if it shows up on American Idol.


Yes, I am in a very weird mood today.  (It's fiscal year end at work and I can't wait until it's over!)

So, happy crafting!  Give it a try and let me see what your version looks like.  I've added some fun new linky parties to visit, so check out the tab up top.

Have a great weekend everyone!

Thursday, March 29, 2012

My Week With Marilyn

Have you seen My Week With Marilyn yet?

I watched it recently and I was happily surprised that it surpassed my expectations.

I'm sure we've all gone through our own Marilyn phases.  When I was a teenager I read everything I could get my hands on about her.  She wasn't just incredibly beautiful.  She was one of a kind and lead such a fascinating life, if only she had known it.

I worried that because Michelle Williams has such a different face shape that it would be distracting and that I wouldn't buy into her as Marilyn Monroe.

Source
She did a wonderful job of capturing the essence of Marilyn though.  Small nuances in the way she spoke and moved were all there.

The wardrobe was especially fun to watch.

my week with marilyn, my week with marilyn wardrobe, Michelle Williams as Marilyn Monroe

Makes me want to put on a wiggle dress right now!  If only I could fill it out like she did~


I think outside of the set she really had quite a classic sense of style.   On set, was a whole different story.

I found these wonderful sketches of the costumes by Jill Taylor over at Vanity Fair.  Check out their entire slide show for behind the scenes tidbits.


The movie is based on a book which is based on the true story of Colin Clark and his experiences with Marilyn Monroe during the making of the movie The Prince and the Showgirl (with Sir Laurence Olivier). 

It's still sad to see the reality of the world Marilyn lived in, but of course, it's difficult to look away.  If you enjoy biography type movies with great sets, lighting, acting, cast, and wardrobe, then I definitely recommend this as a must see movie for you.

Wednesday, March 28, 2012

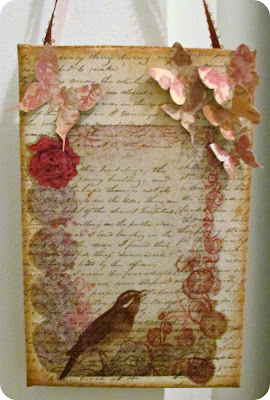
Pinspired Mini Art

Once again I've been inspired by Nancy over at Tattered Treasures.  She makes the most beautiful gift tags that I fall in love with instantly. 
 

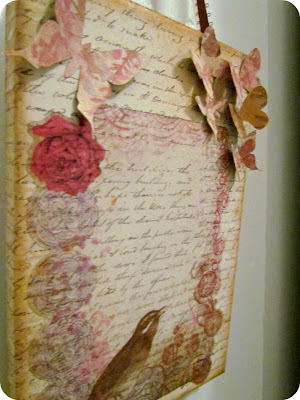
I didn't want to just copy her design to make a tag, so instead I made a mini art piece to hang in my hallway!

mini art, mini canvas, butterfly art, easy paper crafts

It's not really the same at all, but that's what inspiration is all about, right?  Not copying, just looking at things in another way and coming up with your own version.

I used a combination of loads of supplies I had on hand and different techniques.  I Mod Podged scrapbooking paper onto the canvas, spritzed it with Glimmer Mist, and inked the edges with two different brown ink pads.  Then I used snail tape to adhere that pretty celophane frame, leaving the top open just in case I ever find the perfect sepia print photo to stick in there.


Then I cut out some cute little butterflies from some different scrapbooking paper and adhered the bodies to the canvas with my Martha Stewart glue pen so that I could fold the wings up to create some more texture.  That is, after I gave them a little spritz of Glimmer Mist too (love that stuff)!

Then I just added some pretty ribbons to hang it from.  It's a fairly useless thing but it sure is pretty!


Can you find my other Etcetorize projects in this photo? (Hints: here, here, and here )
Have you been pinspired lately?

This project was featured here:

 TTFeatured1 Thrifty Thursday Week 69

Tuesday, March 27, 2012

Advertise with Etcetorize

That has a nice ring to it doesn't it?

Well, I've finally gotten to the point where I feel like I have something more to offer all of you than just great ideas...ad space!

There are two sizes available:


Just click on the tab above for more details on what you get with each ad space.

Space is limited so make sure to contact me soon if you're interested~

Ad spots will start running April 1st.

Sunday, March 25, 2012

Make it Great Monday

Linky Tools had a few problems this week but not before I was able to check out all of your great projects!
Like this wonderful pleated maxi skirt tutorial from Becky over at Reinventing the Ordinary .
You  might think this is a simple project because Becky calls herself a "non-sewer" but this kind of thing takes loads of patience, and yes, a bit of skill.  I don't think you can call yourself a "non-sewer" anymore Becky!

I also really enjoyed this step by step side yard transformation from Samm at Little House in the Big D .  It's amazing how much work went into this tiny space, but boy does it look great!


I think these fuzzy Easter Eggs made with pipe cleaners from Pajama Crafters are the cutest! 

And you need to visit Ticklish Moose if you like vintage images and free downloads like these cute mannequin gift tags:


If you were featured, you can pick up a button in the sidebar~

I can't wait to see what you've all been working on this week!  Before you link up though, please take a quick look at the guidelines:

Please remember to only link:
1) To your Family Friendly Project Post that you've made yourself, not your main blog page
2) Maximum of 3 projects that you haven't link up before
3) Please, no shops or giveaways
4) Feel free to hit one of those Follow buttons on the sidebar ;)

And, not really a rule, but something you won't regret if you do....go visit some of the other links and leave a comment, we all love comments right~

If you link up, please post my button somewhere on your blog so more people can come join the fun:

Etcetorize

I can't wait to see what you've been working on so go ahead, what are waiting for?  Link up!

Friday, March 23, 2012

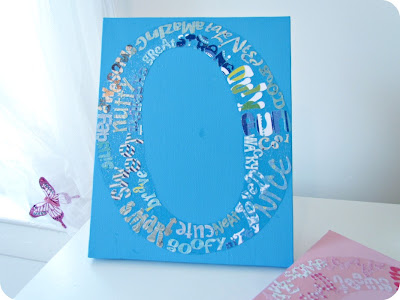
Word Cloud Art

I was playing around with word clouds online last week and had a sudden lightening bolt strike me with an idea for some awesome art for my niece and nephew.

Here's what you'll need:


Preparation Step:
Write down as many positive adjectives as you can that describe the person you're making this for.  Use an online thesaurus if you need some help.

Steps:
1) Paint your canvas to create a background colour.

Don't forget the sides!  I set some spools of thread under the canvases while they dried so that I wouldn't get paint on my table.

2) After a couple of coats of paint have dried, trace the outline of a large letter onto your canvas.  I'm using the first letter of each of the kids names.


3) Using an electronic cutter, cut out your list of words, using different fonts, sizes, and papers for each word. 

4) Paint a layer of Mod Podge onto your canvas within the lines of your letter and start gluing down your words randomly.  Don't put too much thought into it or it will start looking overworked.  That's exactly what I was doing before I glued it all down.  Then I just took it all off, slapped on some glue, and went for it.

5) Seal it with another layer of Mod Podge.  I also added a last layer of my favourite Mod Podge...Mod Podge sparkle~


And tah dah!  Hang it up in your kids room where they'll read it everyday so that they're reminded just how great they are!

Mod Podge, Word Cloud, DIY Word Cloud, DIY Wall Art, Decoupage, Silhouette SD project
I'm still working on the blue one.  Make sure to come back on the weekend to see how it turns out!


I read a lot of "self-help" books and am very into affirmations, especially for kids.  It's never too early to start teaching them to believe in themselves.  This is sort of a subtle way of doing that~

These were a test to see how well this idea would work because I have something else in mind...but much BIGGER!  I'll let you know when I get going on it~

-------Added...finally finished the blue one!    ------------

word clouds, word cloud art, affirmational art, affirmations, easy crafts for kids

word clouds, word cloud art, affirmational art, affirmations, easy crafts for kids

Happy crafting everyone!

Thursday, March 22, 2012

Inspiration Shot: Thailand

For those of you who didn't have a chance to check out my travel blog while I was away, I thought I'd post just a few shots from my trip to Thailand.


It was a wonderful vacation.  I've travelled all over the world and Thailand was one of the easiest to travel in.  Definitely on my list of places to return to.

Linkwithin

Related Posts Plugin for WordPress, Blogger...