Friday, June 29, 2012

Bicycle Bag

I used to live in Japan and while I was there I got really attached to my bicycle.  It was my only mode of transportation and I loved wheeling around the city on it.

Mine's in there somewhere~
The thing about that bike was that it was what I would call "old school" style (or what I affectionately call "Old Lady") and it had the best basket on the front and carrier on the back.  I even carted home my new sewing machine on that bike!

When I returned to Canada I just had to get a bike that was similar and I found this lovely ride.


But it's been several years and I have yet to find an awesome basket for it.  They just don't seem to make them anymore.

So, I've come up with my own.  It's small, just big enough for my keys and a bit of cash, but it will do the trick....for now~

DIY Bike Bag, How to make a bike bag, DIY Bike Basket, Easy sewing project
 
Here's what you need:


-fabric (I'm using an upholstery sample that I got for free ages ago but you can use anything that's sturdy and has some weight to it)
-thread
-bias tape (any size double fold)
-sticky back velcro (both sides)
-pins, scissors, tape measure, and sewing machine
-craft paper if you're making pattern pieces.  (You might be brave and just go straight to fabric)

Steps:
1) Create and cut out your pattern similar to the one below, cutting two of the rectangle and one of the arched piece.


When you place your pattern on your fabric, make sure to take to watch the direction of your fabric. Because mine has writing on it, I wanted to make sure that one side wasn't upside down.


2) Sew seams along three straight edges, leaving the top open.


3) Squeeze the notched corners so that you get a flat edge and sew across.  (For better pictures of this method you can also check out my Sharp Corners tutorial)


That's fading henna on my hand,
not some weird disease~

It should look like this now:


4) Turn your pouch right side out and attach the long straight edge of the arched piece to the back.  Lay right sides together and stitch across edge.

5) Attach the bias tape along the curved 'lid' and around the top of your pouch.


6) Center your velcro and pop a dot on both the pouch and the lid

7) Now this step probably should have been done first, but I wasn't exactly sure of the placement so I left it to last.  Cut two strips of bias tape approximatley 14-15" (35cm) long.  Fold the tape in half and tack onto the back of your pouch near the top.  This is what you'll use to attach the bag to your handle bars


There you go, now you're ready to ride in style!


 In doing this project I was suddenly (at the end of it all) inspired to create something completely different, so I'll try that idea too and let you know if it turns out.

Have a great weekend everyone!  It's Canada Day on July 1st!  Whoo hoo!  Looooong weekend, hot weather, and fireworks, who could ask for anything more.

Thursday, June 28, 2012

Martha Stewart Winner II

Yay!  It seems like maybe the worst of the crazy weather is behind us and I've had power on in my house for more than 6 hours, so I'm hoping it's here to stay.

That means I get to announce the second winner of the Martha Stewart Stitched Paper Pad today after all!

Drumroll please....


Congratulations Carolyn!  (By the way...have you ever visited Carolyn's blog???  She has so many wonderful crafty ideas, you really need to check it out if you haven't already)

Whew, that was a lot of giveaways in one month.  Great big thanks to EKSuccess for supplying all of those fun prizes, and a super huge thanks to all of you Etcetorizers who participated! 

Wednesday, June 27, 2012

Stormy Weather

Just a quick hello to everyone to let you know that access to a computer is touch and go for me at the moment.

We're having some very bad weather here right now and electricity is off and on...mostly off. 

This funnel cloud was one of several spotted in the west-central area of the province.
Source
I hope to reply to all of your lovely comments soon and will post the winner of the Martha Stewart Stitched Paper Pad as soon as I can.

Summer Versatility

At first glance I know what you're thinking...big deal, another tube dress.  Right?  But this is no ordinary tube dress.


I wanted something blousey and not so form fitting.  So, this is actually two separate pieces that will take you from day, to evening, to work, and back to day again!


I love the top on it's own with pants!


And the skirt can easily be worn to work with a slightly more conservative top.


But if you need something to wear to your next patio party, pair it with a contrasting top!
This would be an excellent addition to your vacation wardrobe too!


This is another 'beyond easy' project.  It's just two tubes cut from T-knit fabric that are slightly A-line instead of straight rectangles.  There's 3/4" wide elastic at the top of the skirt and the top and 1/2" elastic at the bottom of the top so that it drapes nicely.

I just whipped this up on the spur of the moment but if you guys want a step by step tutorial let me know.  I like this so much I wouldn't mind two!

Tuesday, June 26, 2012

Giveaway Reminder

Did you get your entry in for the Martha Stewart Stitched Paper Pad yet?!?!  What are you waiting for?


It seriously could not be easier to enter.  Click the link and add your comment~

Sunday, June 24, 2012

Make it Great Monday

Another great party with loads of great ideas last week!  You guys rock.  Here's a small sample of some of the projects that you shared:
1. Check out the awesome tutorial from Marija at Tousled day on how to turn an everyday dish towel into a stylish top.
2. Chocolate and peanut butter together!  Yes please!  Visit Deann at Delightful Curiosity for this great recipe.
3. Stripes can be very challenging to work with.  That's why I love how Hanni at Hannicraft played with the her fabric to make this beautiful tote bag.
4. Julianne at Sew Fantastic made a mountain of hair accessories for her little one and every one of them is super cute, especially her model.  Visit her to learn how she made them all~

If you were featured you can grab a button from the sidebar!

I know you guys are like me and never stop creating, so I want to see what else you've been working on this week~
REMEMBER:
We've got two separate parties going on
so make sure you link up to right one.
Please, Please, Please
link to the right party and
don't make me delete your project.
I absolutely hate doing that.

Take a second to read this before you link:
Please only link:
1) To your Family Friendly Project Post that you've made yourself, not your main blog page
2) Maximum of 3 projects that you haven't link up before
3) Please, no shops, giveaways, or round ups
4) Feel free to hit one of those Follow buttons on the sidebar ;)
And, not really a rule, but something you won't regret if you do....go visit some of the other links and leave a comment, we all love comments right~
If you link up, please post my button somewhere on your blog so more people can come join the fun:
Etcetorize

Let's see what you've been working on!
(Both parties are co-hosted by my friend Gen at Cabin Fevered Gem. If you link up you are giving Gen and I permission to tell the world how great you are and possibly post a picture or a link to your awesome project either here, on Facebook, or on Pinterest. Make sure you're OK with this before you link up.)
MAKE IT GREAT MONDAY PARTY:
for all of your CREATIVE PROJECTS


Photobucket

Here's what's coming up next...
July: Handmade Jewellery
August: Oh Baby!
September: Natural Materials
MOTIVATED MONTHLY PARTY:
for all of your GARDENING PROJECTS

Did you read the post above?  Did you link the right party?  If you did, congratulations, you get to move on to enter the last of my Martha Stewart Giveaway's this month! Get your entry in before Wednesday, June 27th.  Good luck~

Friday, June 22, 2012

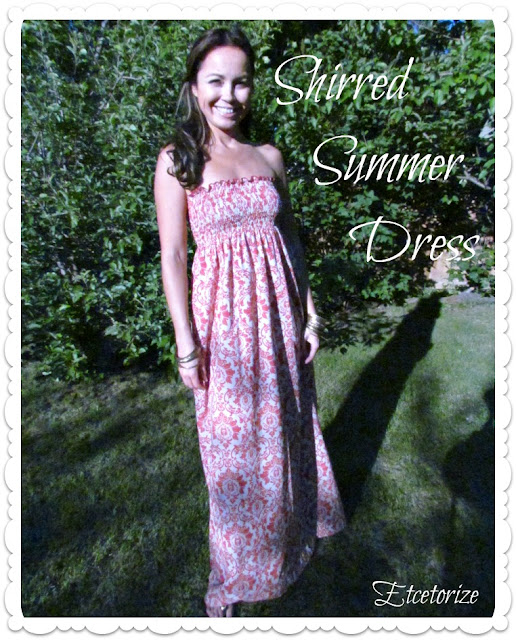
Shirred Summer Dress

Since we seem to be on a bit of a super easy summer fashion roll lately, why stop now?  Let's add a really cute maxi dress to your halter and new purse to round out your hot weather wardrobe!
how to shirr, shirring, make a shirred dress, DIY Summer Dress, Easy sewing, Sew a summer dress

This project is so easy and can probably be completed in less than a couple of hours if you skip a couple of the mistakes I made.

Here's what you need:


-Cotton fabric (the length that you want your dress + approximately 4" for hems)
-scissors
-regular thread, elastic thread, wooly nylon thread
-pins
-sewing machine

Steps:
1) I used a light weight cotton print that was fairly narrow already, less than 45" (115 cm) I think. So,  I just used the full width of the fabric.  If you're using a wider fabric you may want to trim it back to at least 45" wide unless you want more volume.

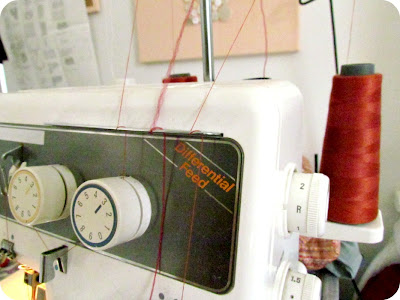
2) Before you do anything you need to pull out your manual for your machine to learn how to do a rolled hem.  I used my serger and added wooly nylon thread to the upper looper.


Every machine does this differently so I'm not going to get into settings and plates and all that, just take a look at your machine manual and it will tell you all you need to know.


This isn't the perfect rolled hem.  On my serger I only use one needle for this stitch.  I didn't thread the other needle but I was lazy and also didn't remove it, which I should have.  If had removed it I wouldn't have the loopy bit on the inside edge.  In the end it's not noticeable because it ruffles but I know it's there, and unfortunately, I have to live with it now.  Boo hoo for me~

If you don't want to venture into rolled hem land, just do a regular narrow hem along one end of your fabric.
3) Hand wind your bobbin with your elastic thread, pulling just slightly as you wind.


4) Place your bobbin in your machine as usual.  If you have a quilting arm, insert that now to help you to space your rows of shirring evenly.
Sorry, my camera really doesn't like my sewing machine
or vice versa.  In any case, they don't get along,
so a couple of these photos are blurry.
Quilting Arm
attaches to my machine behind the needle.
5) Once you're all set up you can start sewing straight lines of stitching, 1/2" apart to create the bodice of your dress.


As you go along your fabric should start to gather itself up and look like this:

Inside of dress (wrong side of fabric)
6) Now, if you're more voluptuous and curvy than I am, you might be able to leave the stitching as is.  If you're shaped like a teenage boy, like I am, then we'll have to do an extra step.  Pull your threads along one side until your fabric width measures somewhere in the following ranges:

Small: 16-19"
Medium: 20-23"
Large: 24-29"


In all likelihood, you had some lines of elastic stitching that started or stopped in the middle of your line.  That's OK.  Just pull from the start of the stitching, making sure to knot it when you're done.

WARNING: Do not get carried away and pull your stitching way, way, way too much....like maybe I did.  Also, don't start pulling your threads until you've finished sewing ALL of your lines.  If you do, continuing to add lines will become more and more challenging....again, I may have learned this the hard way.  Come one, gathering is fun though right?  It's easy to lose control~

Also...DO NOT CUT your elastic bobbin thread until you are absolutely sure your bodice is going to fit around your body.  Yeah, yeah, OK, add that to my list of learnings from this project that I got the hard way.

 If you cut and you've pulled your gathers too far, there's nothing to let out after.  It's fixable, but trust me, just don't go there.
7) OK, now that you've not done all the things I did, and you're absolutely sure that your fabric will fit around your chest area, you can sew a seam down the open edge of your fabric.  This will be the back or side seam, depending on how you decide to wear it.


Make sure to leave an opening from about the knee area down (unless you're going for something ultra sexy and then you can go as high as you want you sexy momma!).  If you don't leave an opening, it may be difficult to walk in this dress, and you may end up looking a bit like a well dressed penguin...and that's just not so attractive in the middle of summer~

8) Last step, hem the bottom to fit your body.

And that, is that!  Whew!


I was hoping to show you the matching dress I'm making for my niece, but it's still sitting on my sewing desk, so that will have to wait.  It's going to be ultra cute though!

This really is beyond easy and it's a great project for a beginner sewer.  I bet all of you mommy to be's would find this super comfy too!  Use shirring on the waistband of a skirt or the arms of a blousy blouse!  The options are endless.  Once you get the knack of it, it goes super fast.

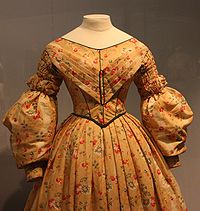
Examples of shirring from Wikipedia:
This cotton day dress of 1836–40
 features shirring on the upper sleeves.
Victoria and Albert Museum.
Here is a close-up of shirring done on the shoulder area during
 the garment construction from a 1925 vintage dress pattern.
Photo provided by Love to Sew Studio
Let me know if you give it a go.  I always love to see projects that are inspired by something you find here!
Also, if you're looking for more awesome, and FREE sewing projects and patterns, head over to Allfreesewing!  I'm sooooo lucky and have not one, not two, but three of my projects featured on their home page right now.  But that's not why I'm leading you there.  It's just a great community with loads and loads of ideas for all sewers and crafters.  Check it out~

This project was featured here:
 

Linkwithin

Related Posts Plugin for WordPress, Blogger...