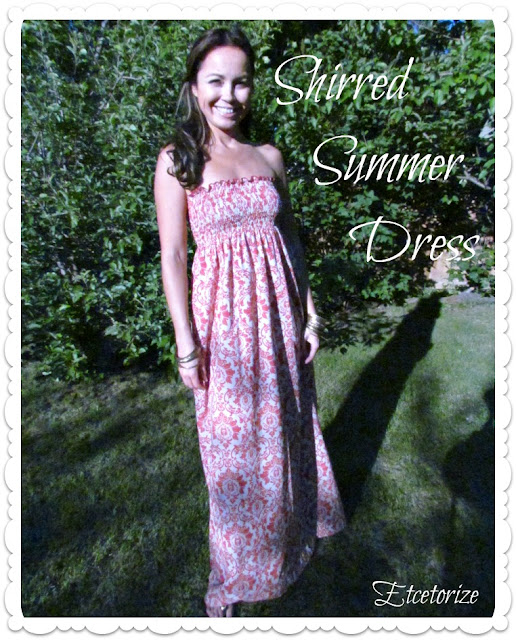
This project is so easy and can probably be completed in less than a couple of hours if you skip a couple of the mistakes I made.
Here's what you need:
-Cotton fabric (the length that you want your dress + approximately 4" for hems)
-scissors
-regular thread, elastic thread, wooly nylon thread
-pins
-sewing machine
Steps:
1) I used a light weight cotton print that was fairly narrow already, less than 45" (115 cm) I think. So, I just used the full width of the fabric. If you're using a wider fabric you may want to trim it back to at least 45" wide unless you want more volume.
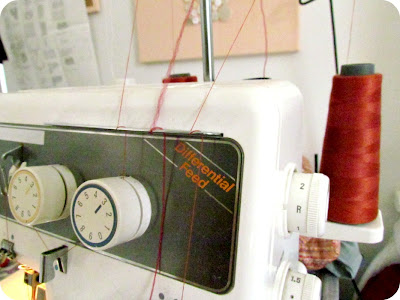
2) Before you do anything you need to pull out your manual for your machine to learn how to do a rolled hem. I used my serger and added wooly nylon thread to the upper looper.
Every machine does this differently so I'm not going to get into settings and plates and all that, just take a look at your machine manual and it will tell you all you need to know.
This isn't the perfect rolled hem. On my serger I only use one needle for this stitch. I didn't thread the other needle but I was lazy and also didn't remove it, which I should have. If had removed it I wouldn't have the loopy bit on the inside edge. In the end it's not noticeable because it ruffles but I know it's there, and unfortunately, I have to live with it now. Boo hoo for me~
If you don't want to venture into rolled hem land, just do a regular narrow hem along one end of your fabric.
3) Hand wind your bobbin with your elastic thread, pulling just slightly as you wind.
4) Place your bobbin in your machine as usual. If you have a quilting arm, insert that now to help you to space your rows of shirring evenly.
 | ||
| Sorry, my camera really doesn't like my sewing machine or vice versa. In any case, they don't get along, so a couple of these photos are blurry.
|
5) Once you're all set up you can start sewing straight lines of stitching, 1/2" apart to create the bodice of your dress.
As you go along your fabric should start to gather itself up and look like this:
 |
| Inside of dress (wrong side of fabric) |
Small: 16-19"
Medium: 20-23"
Large: 24-29"
In all likelihood, you had some lines of elastic stitching that started or stopped in the middle of your line. That's OK. Just pull from the start of the stitching, making sure to knot it when you're done.
WARNING: Do not get carried away and pull your stitching way, way, way too much....like maybe I did. Also, don't start pulling your threads until you've finished sewing ALL of your lines. If you do, continuing to add lines will become more and more challenging....again, I may have learned this the hard way. Come one, gathering is fun though right? It's easy to lose control~
Also...DO NOT CUT your elastic bobbin thread until you are absolutely sure your bodice is going to fit around your body. Yeah, yeah, OK, add that to my list of learnings from this project that I got the hard way.
If you cut and you've pulled your gathers too far, there's nothing to let out after. It's fixable, but trust me, just don't go there.
7) OK, now that you've not done all the things I did, and you're absolutely sure that your fabric will fit around your chest area, you can sew a seam down the open edge of your fabric. This will be the back or side seam, depending on how you decide to wear it.
Make sure to leave an opening from about the knee area down (unless you're going for something ultra sexy and then you can go as high as you want you sexy momma!). If you don't leave an opening, it may be difficult to walk in this dress, and you may end up looking a bit like a well dressed penguin...and that's just not so attractive in the middle of summer~
8) Last step, hem the bottom to fit your body.
And that, is that! Whew!
I was hoping to show you the matching dress I'm making for my niece, but it's still sitting on my sewing desk, so that will have to wait. It's going to be ultra cute though!
This really is beyond easy and it's a great project for a beginner sewer. I bet all of you mommy to be's would find this super comfy too! Use shirring on the waistband of a skirt or the arms of a blousy blouse! The options are endless. Once you get the knack of it, it goes super fast.
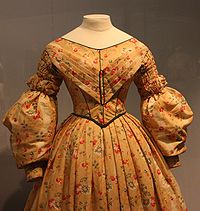
Examples of shirring from Wikipedia:
 |
| This cotton day dress of 1836–40 features shirring on the upper sleeves. Victoria and Albert Museum. |
 |
| Here is a close-up of shirring done on the shoulder area during the garment construction from a 1925 vintage dress pattern. Photo provided by Love to Sew Studio |
Let me know if you give it a go. I always love to see projects that are inspired by something you find here!
Also, if you're looking for more awesome, and FREE sewing projects and patterns, head over to Allfreesewing! I'm sooooo lucky and have not one, not two, but three of my projects featured on their home page right now. But that's not why I'm leading you there. It's just a great community with loads and loads of ideas for all sewers and crafters. Check it out~This project was featured here:


18 comments:
Stopping by from 5 Days 5 Ways...
That dress is really cute. Question... does every sewing machine have the ability to shir? I've tried it a couple times on mine, to no avail. :( It looks so fun and easy, too!
Wow, this one helluva dress project. I love your sewing skill as I don't have it. Love the dress too, perfect for summer!
Very cute! It looks adorable on!
This is so cute,thanks for sharing!
www.blissfulsewing.blogspot.com
Thank you everyone....to answer Becca's question, I don't see why you couldn't do this technique on any machine but it's best to look through your manual first. Depending on your machine you may need to wind the elastic thread tighter. Some machines do this better with a small zig zag. Just practice a bit and play with it before you sew your garment. Have fun!
TAMARA, I WANTED TO LET YOU KNOW THAT I NOMINATED YOU FOR THE SUNSHINE AWARD BECAUSE YOU ARE SUCH AN INSPIRATION TO ME. IF YOU DON'T HAVE TIME TO POST THIS IT'S OK BUT FOR MORE INFORMATION ABOUT THE AWARD YOU CAN FIND IT HERE http://delightfulcuriosity.blogspot.com/2012/06/sunshine-award.html
This is absolutely stunning!! Love this dress and I'm so happy you shared it at Mop It Up Monday! Have a great week! :)
Beautiful.. I absolutely LOVE your style.. Great prints and awesome outfit.. I would LOVE if you could please share / link this awesome post to my Mannequin Monday's party happening now pweeease.. LOVE this.. Hope you can stop in.. Wishing you a beautiful evening.. xo.. Marilyn - http://www.theartsygirlconnection.com/2012/06/mannequin-mondays-other-side-of-cool.html
Gorgeous dress Tamara! and thanks for sharing all you learnt when making it! I'm yet to try shirring, so I'm hoping I can learn from others and not make too mistakes myself! (that's the plan anyway!)
Congrats on the features at Allfreesewing - I agree -awesome site!
Thanks for linking to a Round Tuit!
Hope you have a fabulous week!
Jill @ Creating my way to Success
http://www.jembellish.blogspot.com/
beautiful dress, and you make it sound so easy
Tamara, I was in Hancock Fabrics the other day and they sell the material already shirred - but it's expensive!! If I recall correctly, it's about $13/yard! I could buy really nice fabric for that, not just sundress cotton. Soooooo, I'm going to grit my teeth and jump into this project this week. Trouble is, I'm afraid I'm going to look like those pretty mothers=to=be in it = I have issues with carbs! LOL! Whatever. When it's 90+ with 90% humidity, I'll be cool in my newly made, shirred dress. Thanks - love the site, just found it. Jean Godwin
Just go for it Jean. If you're nervous about wasting fabric, make it as a top first to see if you like it. You may also want to try continuing the shirring lower than what I did. That should take care of the 'mom to be' effect~ Have fun! I can't wait to see your version~
(PS...$13/metre for shirred fabric is not bad...it sells at my local store for $19/metre, but yes, it's cheaper and more fun to make your own)
Cute dress and great tips! I would love for you to link those up to {I Made This} at Grits & Giggles! http://www.gritsandgiggles.blogspot.com/2012/06/i-made-this-11.html
This is SO cute! I'm featuring this on my blog at http://chicaesartistica.blogspot.com
Come stop by, grab a button, and say hello!
Love this dress, so pretty! I featured you today on Sunday Round Up :) http://www.kaylascreationsblog.com/2012/06/sunday-round-up-16.html
-Kayla :)
I find shirring to be so flattering on a lumpy or flat body (I have both, how unfair is that, lol) but never thought to actually try it. Must invest in some elastic thread.
Hi!
Thank you sooooo much for this tutorial!!!!
I'm going to make one for myself too!!!!
Thanks, Dany
Thank you so much for all the detail you go into in your tutorials. I find them easy to follow & it gives me the confidence to give it a go :) You are awesome!!
Post a Comment