Hey...did you notice?!?! I added a new tab up top!
Yeah, right up there , next to the Linky Parties tab.
You can find all of my posts and videos on Spool Knitting in one spot now!
I'm not an expert spool knitter, in fact I don't think I even call it the proper term, but I enjoy doing it. The more you play with your knitter, the more fun you'll have coming up with fun new projects too!
I've even added an ongoing linky party on that page so that you can show off your projects. I really hope you'll link up so I can see what you've made.
This is for all the non-knitters out there! Even if you don't knit, you can make your own sweaters .... on your spool knitter!
All you need for this project is your spool knitter (loom), 3-5 skeins of wool, and some scissors.
If you're new here and have never done spool knitting before, go to the tutorials tab up top for loads of posts on how to make your own knitter and what to do with it...it's EASY!
To make today's project, check out the video below:
That's it! So easy right?!?! Have fun. I can't wait to see what all of you cool creative people out there come up with.
Have you ever knit something to wear? Did it turn out? Any knitting disasters out there? Leave a comment and tell us all about your knitting adventures~
I don't know about you, but it's been awhile since I've pulled my spool knitter out. Let's get back into it with a nice easy project:
Yes, more boot socks. This is for those of you who don't feel like cutting the sleeves off of your favourite sweater or making them from lace. These are comfy, cozy, and have the real look of something made from scratch with love.
Well, the calendar says it's fall but if I look outside my window it is most definitely winter. I don't think the snow is going anywhere anytime soon, so you know what that means???? It's time to pull out your spool knitter!
If you're new to Etcetorize I'm going to point you to some posts from the past so that you'll know what I'm talking about and you can get ready for Friday's project.
While I was sick I couldn't do much of anything except watch Coronation Street and sleep. After a few days though I was getting a bit stir crazy and really wanted to get into to the studio to make something. I was itching to create. But I really just had zero energy and couldn't do much of anything at all
Until I pulled out my spool knitter! I was able to do it while laying on the couch watching TV. Once you know how to do it there's really very little thought that has to go into it and the end result is usually something both beautiful and useful!
So, here's one last spool knitting video for the year. In this one I also show you how to make and add fringe to your project.
If you're new to the series you can learn how to make your own spool knitter here , learn the basics here, and catch up on fun spool knitting projects here and here .
Well, the forecast is calling for snow this weekend so I'm getting ready by making myself something to keep warm.
This is the fourth video in my series of how to make and use what I call a spool knitter. If you're new to Etcetorize you might want to head over to the tutorials page to get caught up or you can just click here let learn how to make your own knitter.
Go here to learn how to cast on and off and the basic knit stitch.
And in this new video I'm going to show you how to use everything we've learned so far to create a beautiful cowl.
Hope you enjoy!
I picked up some super duper neat wool at the Creativ Festival last weekend and am hoping to do another fun video soon showing you how to work with it. It's not like anything I've ever seen before so make sure to stay tuned!
Have a great weekend everyone! Don't forget to come back on Monday to link up and share your fun creations~
I promised to share another spool knitting stitch with you so here it is! If you're new to spool knitting make sure the check out my post on how to make your own Spool Knitter and you can go here to learn the basics of casting on and off and the beginner stitch.
I'll try to do some screen grabs below for those of you who aren't able to watch the videos, buy trust me, it makes much more sense in the video...
Steps:
1) Cast on as usual.
2) On your second section, loop your wool under and up through the wool on the front of the section.
3) Bring the whole section of wool up and off of the knitter.
4) Place the loop down on the knitter, it is now at the front of the section.
That's it, that's the stitch. Just repeat that over and over on every section and you'll end up with a nice texture to your piece:
I made mine into a short tube and made a toque out of it, but there are so many other fun projects you can make with this. Let your imagination run wild!
Dreaming of a day when I don't have to wear a toque!
I'm leaving the Spool Party tab open for one more month so that you can share your projects. I can't wait to see what you come up with!
I'll be posting this at all the linky parties throughout the week so make sure to check out all of the fun links on the linky party tab up top.
Did you notice??? I've harnessed the power of the linky and have reorganized all of my pages up top so that you can find projects and other posts easily. Let me know if you like this new format.
Wow, so much is going on this week that I'm going to have to give the Show and Tell post a rest this week.
First of all, thank you so much to all of you who signed up as a follower! Because of you I can do my very first giveaway.
The winner of the handmade pretty clips and pencils is comment # 5 Random Integer Generator
Here are your random numbers:
5
Timestamp: 2010-12-01 02:01:23 UTC
Congratulations Moe! I'll be in touch with you soon to find out where to send your prize!
Spool Knitters Linky Party
The Spool Knitting posts from last month were such a big hit! I decided that I really wanted to see the projects that you guys made, so for the month of December I'm opening up a linky party tab at the top of page. It'll be open all month and you can enter as many projects as you like. I just want to see how creative you can all get! Check back later today for the tab It's up now!
Everyone is welcome to participate.
I really can't wait to see what you all come up with and to get started on Christmas crafting throughout all of December!
Here's something fun I came across on YouTube that I thought you Spool Knitters would find interesting and will inspire you to get knitting:
All right! By now everyone should've eaten all of their ice-cream and have their Spool Knitters ready to go. Let's get started!
All you need for this project is your spool knitter and a ball of soft, fluffy wool.
This week I'll show you all the steps through three videos. I'll post a summarized version below step by step for those of you who aren't able to watch the videos, but it will probably make more sense in real time:
Setting Up:
Tips:
Casting off:
Summary Steps to make a flat scarf:
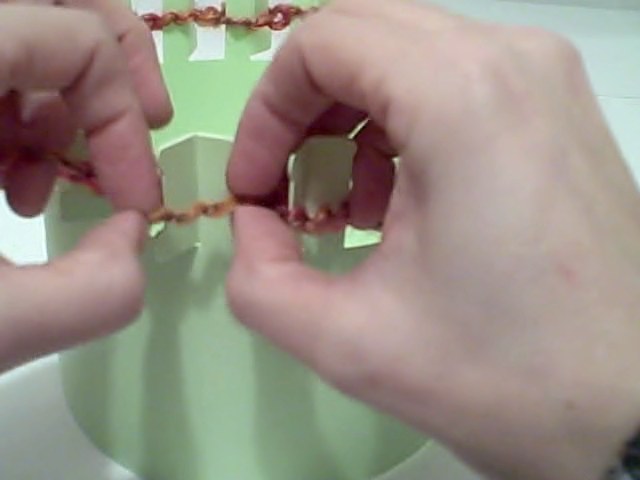
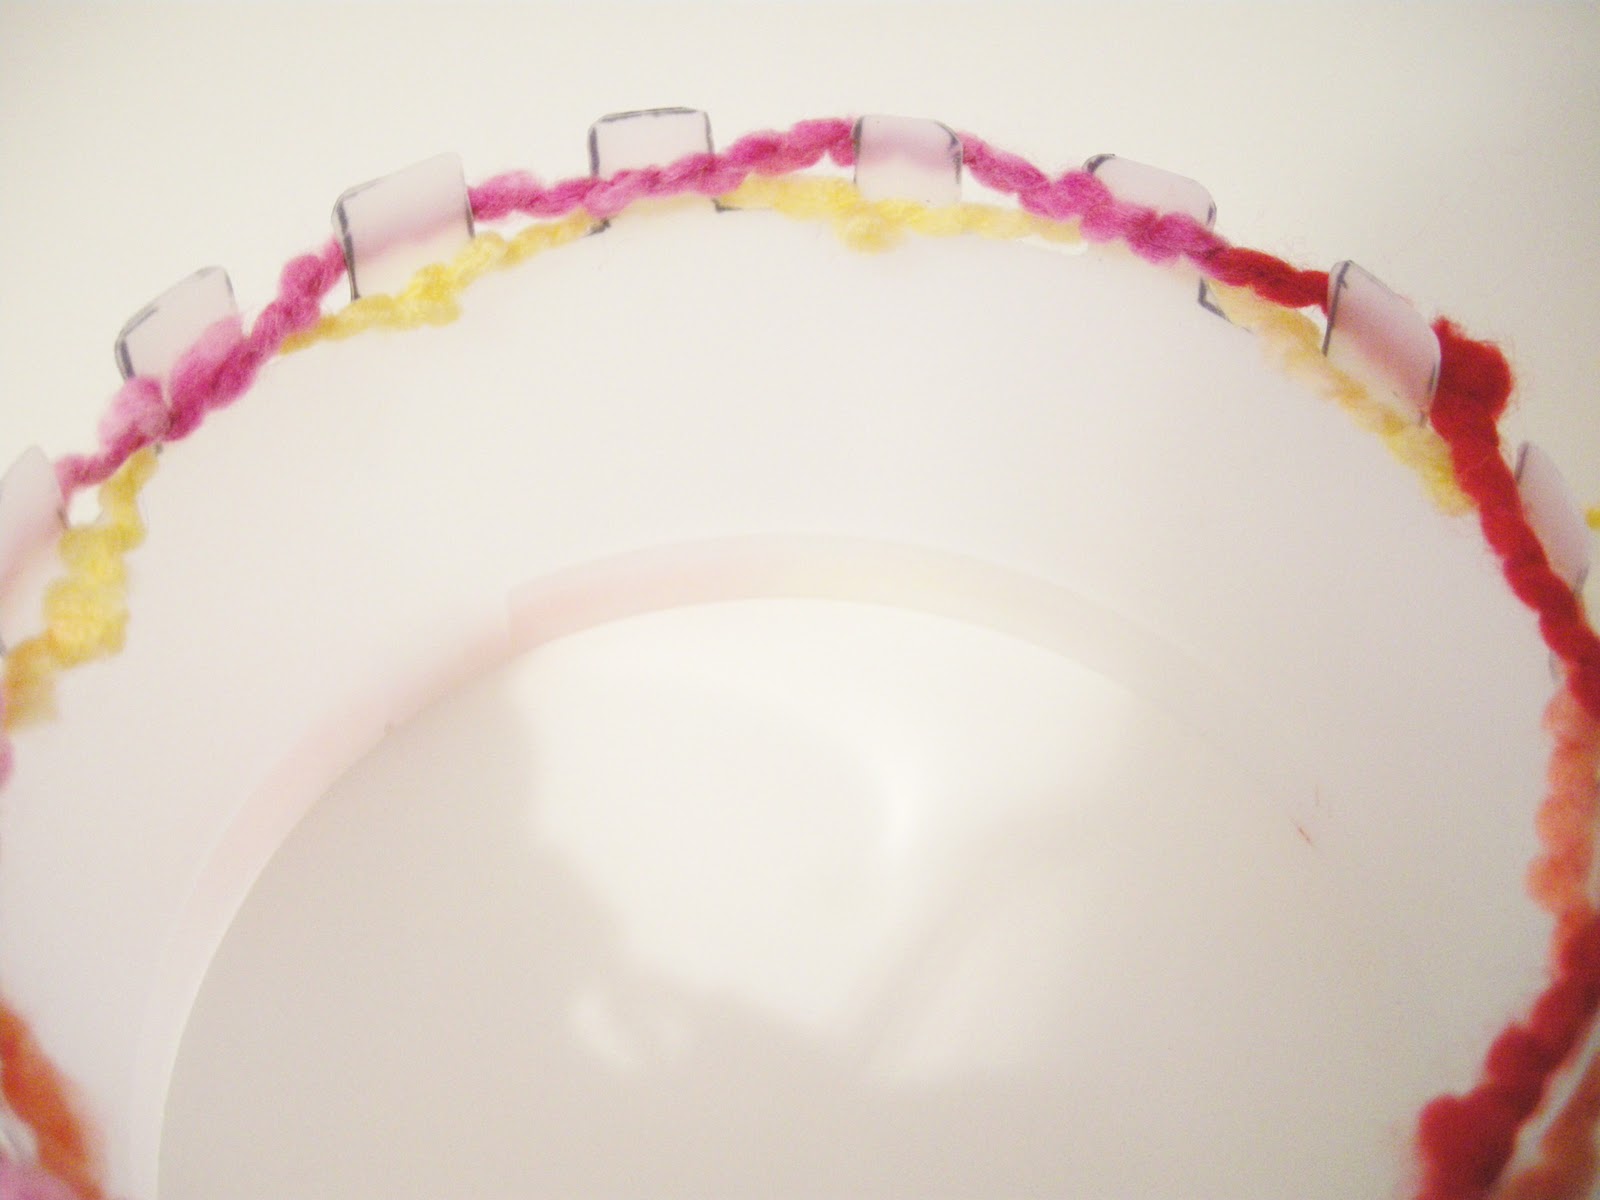
1) Choose one section as your starting point (it doesn't matter where). Weave your wool in and out of each section, stopping when you get to the last section. Loop around last section and wind back to the beginning, making sure each section now has one line of wool in front and one in back.
2) Now you should be back at your first section, loop wool around. It should be sitting in front of the second section. There are now two lines of wool in front of section two. Gently pull the piece that's on the bottom over top of the top line of wool, and over the section, placing it behind the section.
3) Now you're spool knitting! You just keep repeating this step on each alternating section. When you get to the end wind around and continue, never knitting on top of the same section twice. (sorry, the rest of the shots are going to look a little funny because they're screen grabs from the video. I got so into knitting that I forgot to take photos!)
4) Eventually it starts coming out the bottom of your knitter. Don't worry that it's stretched out at the top, it naturally tightens up.
5) When you get near the end of your wool you'll need to cast off. First make sure you have enough wool left to run around the knitter once. Don't cut anything, just wrap it around to make sure you have enough.
6) Now that you know you do (if you don't, just unloop one row of stitching), you will simply loop the wool under each section. Don't miss any sections this time. This will secure it so that it won't unravel when you take it off the knitter. Once you get to the last section you can gently take the scarf off of the knitter. Pull the tail to tighten up the end and make it the same width as the rest of the scarf. You can stretch and pull the scarf a little to even it all out.
7) Just weave any tail that's left over into the scarf and secure with a knot. Voila! You're done! And probably in record time!
Some tips:
-Control your tension by gently tugging on the wool in front of the section that you just looped over.
-It doesn't matter how many sections you have, it will always work.
-If you have arthritis or other aches in your hands, try using a crochet hook to do the looping for you.
I really hope that you're able to watch the videos because it's so much easier to follow that way. In any case, have fun with this, try different types of wool, or different sizes and shapes of spool knitters. Add a fringe on each end for something extra. (Just cut pieces of wool approximately 8"long, group into three's, fold in half, and loop into each hole that runs along the ends.)
Leave a comment and let me know how you get on with it (no goofy jokes aboot my Canadian accent, eh~). These make lovely Christmas gifts that are fast and easy to make but still have a very personal touch. If you want to learn more stitches or how to make other projects with your spool knitter make sure to let me know and I'll do other video posts throughout the winter.
Happy knitting!
Don't forget to enter my giveaway! Just sign up as a follower and leave a comment on the Desk Set: The Rest of the Story post, link is in the sidebar.
(There are only 14 comments so far so your chances of winning are really good!)
Thanks to Between Naps on the Porch for sending so many visitors my way this week. Go visit Susan and check out the other fun ideas and projects there.
I'll be posting this project at the linky parties throughout the week so make sure to check out the tab at the top of the page, including TCB .


%20to%20make%20a%20sweater!%20%20Perfect%20for%20non-knitters~ "Pin It")