Well, maybe it has something to do with THIS!
Yes, SNOW! S-N-O-W! And not just the little light shimmery pretty stuff that melts as soon as it hits something. This is full blown, get the snow shovel out and start digging SNOW!
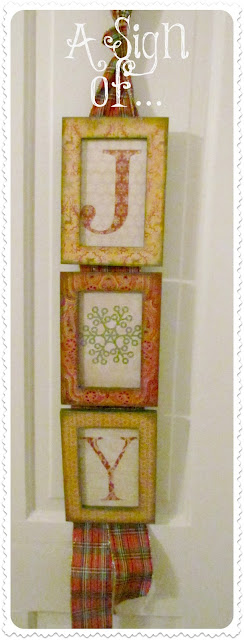
So, in an effort to love it and get in the winter mood (instead of crying myself asleep to dreams of faraway hot vacations) I'm trying to feel the JOY.

Here's what you need:
Materials:
-3 small wooden picture frames
-acrylic paint, mod podge, 2 paint/sponge brushes
-papers (3 neutrals for backgrounds, 3 print to cover frames, 3 different print to make letters)
-staple gun and sharp edge or scissors
-optional: ink, glimmer mist, embellishments
Steps:
1) I had painted my frames hot pink to go with the decor in my studio before I did my mini-makeover. Now they're just too loud. I started by painting the inside and outside edges. Don't worry about the flat front part, we're going to cover that with paper later.
2) While you're waiting for your paint to dry, use the insert from the frame as a template to cut three papers for backgrounds.
3) Once the paint is dry, use your frames to trace out three printed papers.
4) And now my favourite part...get out the Mod Podge! Paint a layer of Mod Podge onto the front of your frame and place the paper you just cut down (right side up).
Normally you'd paint another layer of Mod Podge on top right away, but hold off, because we're going to add a little something to make your frames extra special!
5) If you have some Glimmer Mist on hand, give your frame a nice layer to add some beautiful shimmer.
I love my Sparkle Mod Podge, but this is just a slightly more
subtle and sophisticated way of adding shine.
(pssst...here's a trick my friend Gen taught me...to get into the hard to get spaces,
use a make-up sponge. Just tap it onto your ink pad and then wipe and dab it onto your piece.
It's more flexible and gets right into the corners)
7) OK, now you can go ahead and add the top layer of Mod Podge to seal all that work in.
8) Now we need something to put inside of these beautiful frames. So, if you're lucky enough to have a cutting machine, cut out your letters, with a snowflake for the "O". You can get creative with scissors and do it old school too.
9) Using your Mod Podge or some other adhesive, secure your letters to the background papers you cut way back in step 2 and then place inside of your frames.
10) Almost done! Cut a looooooooooong piece of ribbon, fold it in half, knot it at the top, and staple it onto the back of your frames taking care to space the frames out evenly.
All right! In the immortal words of Jane Fonda...CAN YOU FEEL IT?!?! (You had to do the workout in the '80's to get that joke). In any case, go ahead, feel the joy...
Hopefully the snow will melt this weekend and I can get back to regular crafting.
Have you started your Christmas crafting yet? Leave a comment below~
This project was featured here:


10 comments:
Pinned. I love it! But then you know my favorite word is Joy. Right?
I've been Christmas crafting since September and I love that it's starting to show up on blogs. Nothing wrong with planning ahead! Very cute joy sign!
I just got through with my Halloween cards! Next is Thanksgiving here in the States, then Christmas.
I love your color combinations and I am a lover of the Glimmer Mist!
Hi Tamara,
I just loved your project like I love Christmas!!! In Portugal we dont't celebrat Halloween and in some palces begins to smell Christmas :)Thanks to sharing!
Happy weekend,
Hugs from Portugal,
Ana Love Craft
www.lovecraft2012.blogspot.com
That's just beautiful Tamara! Snow would make me start my Christmas crafting too - but with summer just starting here and temps already hotting up, I'm as yet uninspired!
Thanks for linking to a Round Tuit!
Hope you have a fabulous week!
Jill @ Creating my way to Success
http://www.jembellish.blogspot.com/
Oh, I love this!! You did a fantastic job. I'm definitely pinning. :)
I'm LOVIN' it! By golly, I would be feelin' the Christmas spirit too if I had so much snow. WOW! Bring on the Christmas Joy! ;)
That's beautiful, the ribbon kind of looks like a winter scarf, perfect for the snow
Hi!
I just stumbled across you blog, and have already found multiple crafts I'm envying! This joy sign is precious. My husband won't let me start decorating until Dec. 1, but that doesn't mean I can't start getting my ammo together, right? Thanks for the great tutorial!
Dianna @ Virginia is for Lovers
I love this so much! Totally adaptable year-round!
Come visit us at www.thesitsgirls.com!
Post a Comment