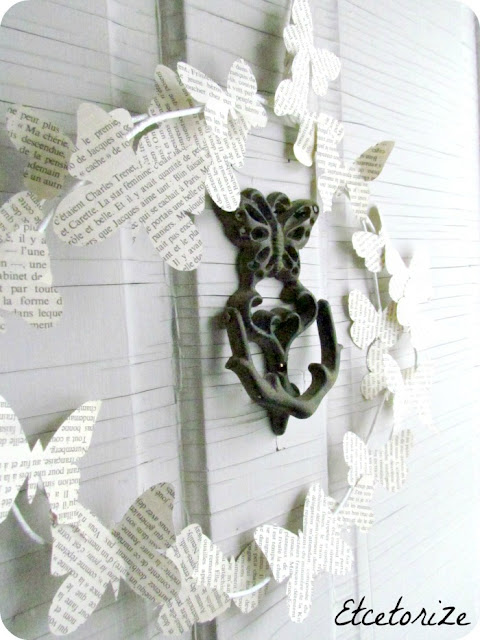
Here's what you need to make your own Springtime Butterfly Wreath:
Materials:
-wire hangers
-book pages
-hot glue gun w/glue
-optional: White acrylic or spray paint, Sparkle Mod Podge, sponge brush
-cutting machine or the patience of a saint and scissors
Steps:
1) Stretch out your wire hangers into something that looks more like a circle than a hanger. Don't worry about the top, we'll use that to hang your wreath once it's done. Also, don't worry if it's not perfect, it's not supposed to be~
2) Now, if it weren't still winter here I would've just taken my circulesque hangers outside and sprayed them white (or better yet use white hangers), but it's still way too cold here, and besides I didn't have any spray paint left over. So, I used acrylic paint and just dry brushed it on.
Use it fairly dry and just bounce your brush onto the metal hanger. If you try to brush it on you'll only sweep the paint right off. Again, it doesn't have to be perfect, because most of it will be covered anyway.
3) While your paint is drying use your book pages to cut out butterfly shapes. I'm lucky enough to have a Silhouette machine that did all the work for me. I used the butterfly shape called "Butterfly Set" that comes with 5 different shapes and sizes that you can ungroup and use however you want.
4) Your paint should be dry now so let's put a good healthy coat of Sparkle Mod Podge on top. This is a small detail but it's what can really make your wreath sing. I like to use Sparkle Mod Podge because it's fairly mess free sparkle. You can go the messy route and do it with spray or sprinkle, but I've got enough mess going on already.
5) Let your hangers dry one more time and get the glue gun ready to go because next we're going to start adding butterflies. While your gun is heating up, you can use a bit of thin wire to bind your hangers together if you've used more than one.
6) Now the fun part....add some butterflies. Use as many or as few as you like!
7) The last step is to take down your Christmas sign from your door and put up your springtime wreath in the hopes that Mother Nature see's it and STOPS SENDING SNOW!!!! It's been six months! We get it, you can move on now Mr. Winter~
I still might add a some Glimmer Mist but for now it goes well with my Butterfly door knocker.
Don't be shy to send me some warm weather and leave a comment below~


6 comments:
I love the look of the painted hanger--it totally works!
This is beautiful....thanks for sharing.
a sweet wreath!
I love this wreath!
On a 'large' sidenote: When you mentioned you have snow, I thought she must be from Saskatchewan or Alberta!! I had to go find out. I currently live in Alberta but I was born and raised in Saskatchewan (my fam is still there, PA area). So nice to find another blogger close to home (I follow so many people from the states! and of course they are actually experiencing Spring weather, unlike us) Anyways nice to find you! And my fingers are crossed that the snow will leave soon ;)
What a great use for book pages, but I love even more that you used wire hangers for your wreath form.
This is pretty! Love the white hanger method. And the newsprint is darling!
I'm visiting you today from Hepworth's. I hope you get a chance to stop by my blog and comment, too!
~ Megin of VMG206
Tile Photo Coasters ~ Gift Idea
Post a Comment