Showing posts with label Paper. Show all posts

Friday, December 5, 2014

Wine Glass Tags

When everyone comes over for Christmas, there is inevitably a point in the evening where someone says "Hey, you're drinking my drink!" or "Hey, who stole my drink?!?".  So this year everyone's getting wine glass tags when they come to the bar.


I made mine with my Silhouette machine but with a little patience you can easily do this without a cutting machine.  Here's what you need:


Materials:
-Special Occasion paper and plain paper
-Glue runner, scissors
-markers or sketch pens
-if you're not using a cutting machine you can use a template or some other small round object to trace

Steps:
1) Create a circle shape about 2 3/4" round.


2) Create another smaller circle just inside and off centre.


3) Make a copy of this shape, group it, and set it aside.

4) Now create an overlapping rectangle across one side of the large circle, overlapping edges.


5) In the modify toolbox, click on the Crop button.  The will leave you with only the piece that was overlapping.


Now these next few steps are going to seem a little repetitive but this is how I usually operate when using my sketch pens and cutting.

6) Copy enough of your weird little shape from step 5 for the number of tags you want.  Using your text tool write the names of your guests inside each one.

I'm using the font :Gentle Touch
7) Now go back and delete all of the outline shapes.


8) Load up your favourite Sketch pen and send to Silhouette for printing.

VERY IMPORTANT: DO NOT MOVE YOUR MAT AFTER MACHINE IS DONE SKETCHING.  Leave your mat in place and do not take it off the machine.

9) Hit undo until your screen looks like it did in step 6.  Now delete all of the names.  Replace your sketch pen with your cutting blade, and send to Silhouette for cutting.


10) Don't forget to cut out all of your base circles from some pretty Christmassy paper.  Then just glue the pieces together.


11) I know what you're thinking...how the heck do I get this on a wine glass?  Easy, just make a little snip in between the two circles.


Now you can really go to town and ink the edges or add glitter if you want, or you can just add them to your wine glasses as is.  If you have a few beer drinkers at the party, steal some of this colourful little loom elastics from the playroom and attach a tag to a bottle that way~


You can make some extra blank ones for those surprise guests and just write names on with a marker.  Or you can really make it fun and instead of names write some Christmas trivia on the front with the answers on the back.  Get creative and have fun with your tags~

Check out my other fun (and very popular) wine glass project HERE.

What will you put on your tags? Leave a comment below.

Wednesday, December 3, 2014

Practical Christmas Cards

This year for Christmas cards I thought I'd try something a little different...a little more practical:

This is Silhouette design #67747 by Lori Whitlock
I love that this card contains something that's actually of use, cute little tea lights!


For the top 2, I used some papers from my stash.  For the bottom 2, I cut up some Christmas cards from Christmases past. See, this is my problem with cards....how long do you keep them?  What do you do with them afterward?  At least these 2 got put to use again~


You can see here that the top part opens up. I haven't put my sentiments in there yet but hopefully I will before Christmas rolls around.

I found that I had to enlarge the design about 1/4"  to fit the tea lights.  Maybe tea lights are different sizes in different countires?  Who knew?  The design also comes with several Christmassy embellishments that I didn't use.

You could add some acetate to the front window but I didn't want it looking like it was purchased so I left it open.  The glitter tea lights are from the dollar store.

Do you still give Christmas cards every year?  What do you do with yours at the end of the season?  Leave a comment below~

Saturday, November 29, 2014

Make Your Own Nail Stickers

My nails were doing ok until I had to go and change out almost every bulb on my Christmas tree this week.  Now they're a wreck and I can't be bothered to paint them again.  My solution....DIY Nail Stickers!

Make your own nail stickers, DIY Nail Stickers, Nail Templates

Here's what you need to make your own stickers:

-Blank stick on labels and a printer
-Cutting machine or pencil and scissors
-images


Steps:
1) First find your images online and print them onto your label sheet.  My labels are 3.33" X 4" (shipping labels) and I just did some Google searches using phrases like "Small Christmas Background" or "Small Sequin Background" etc.


2) Now find a nail template online like this one from LifewithFaith.org


3) If you don't have a cutting machine just cut out the shapes, trace onto your labels, and cut out.  If you do have a cutting machine you can use the trace and replicate features to let your machine to all the work for you.

Import your image and then find the Trace options:


Click on Select Trace Area and move your pointer to select one section of the nail images.


Now click on Trace Outer Edge.  Once you've done this you can move the original image out of the way and just use your traced image.  You will probably have to readjust to fit your finger size.

Don't forget to Replicate another set by mirroring the image first.


It took me a few tries to get an ok fit. I was a little disappointed at first when they wouldn't stick but then I took off my nail polish and tried again.


Much better!


Try coating with a layer of clear polish to really seal down the edges.


So much fun!  These won't last more than one party, but I find the expensive ones from major nail brands don't do much better either.

What images would you put on your nail designs?  Leave a comment below~

Wednesday, October 15, 2014

Perfect Little Pill Box

No, I'm talking talking hats, I'm talking about an actual little box to put your pill bottles into~

I was standing at my kitchen counter the other night and suddenly realized that I have quite a mess of medications sitting on top of my microwave.  I know this is probably not a good spot for them, but that's where they sit. (I have a weird phobia about medicine cabinets, they just gross me out.)

perscriptions, pain killers, supplements, vitamins, allergy stuff...
what a mess!


Then I found this cute little box pattern on Silhouette last weekend.


You're supposed to use it to store your washi tape collection in.  Luckily for me, and my craft closet, that's the one and only craft trend that I've managed to pass up.  I just knew that if I started buying it I wouldn't stop, so I avoided it altogether.

But I still made the box...


And look at this.  The washi tape holder is the perfect size!  It fits a small pill bottle perfectly.


I ended up making two, got rid of a couple of expired perscriptions, and now don't have quite such a mess.


Do you have any crafting trends that you've intentionally skipped over for the sake of your pocket book?  Leave a comment, and make sure to jump over to YouTube to watch THIS hilarious video while you're at it:

Linda from Lindababyus

Friday, October 3, 2014

Cutlery Covers

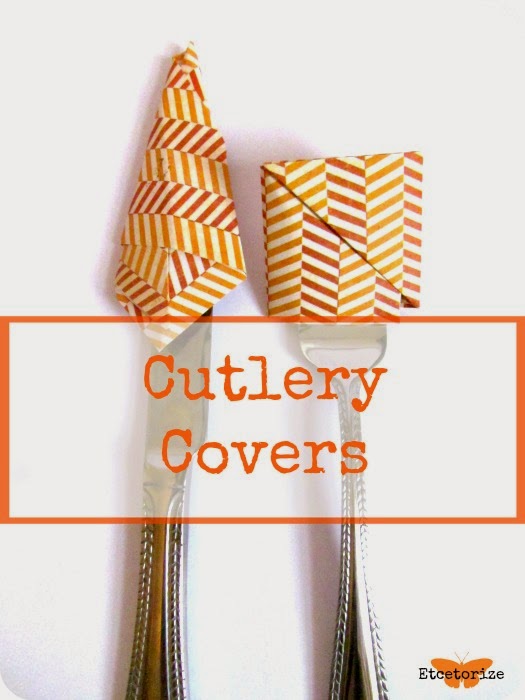
I like making pretty things as much as any other crafter out there.  But what I really love doing is making pretty things that are practical!  Like these awesome Cutlery Covers~

DIY Cutlery Covers, Origami


Every once in awhile I forget my lunch kit in the fridge at work and the next day I have to throw my lunch, and my utensils, in my purse.  I figured with some easy-to-make covers I could avoid sticking myself with my fork and better yet, keeping my utensils clean enough for eating off of.

Here's all you need to make your own Cutlery Covers:


Materials:
-Pretty Paper
-Ruler and Pencil
-Scissors

That's it!

We'll start with the Fork/Spoon cover:
Steps:
1) Start with a piece of paper with the dimensions shown below.


3) Fold your paper in half length wide so that you have a skinnier long rectangle.


4) Fold in half cross wise to find the centre.


5) Unfold.  Find the halfway mark of the right hand side and fold up.


6) Keeping the last fold in place, fold the square at the top down.


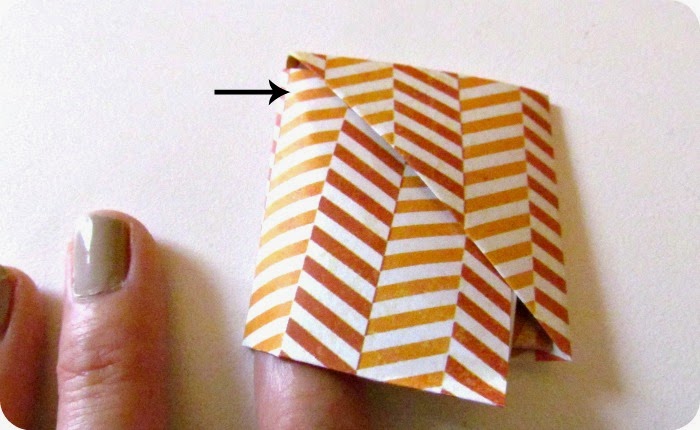
7) Fold the entire right hand side square over so that you can see the little pocket.


8) Simple fold the left hand side square into the pocket to secure everything in place.


You should have a little pocket like this:


Just slip your fork or spook inside:


Now, for your knife:

Steps:
1) Start with larger piece of paper with the dimensions below.


2) Fold the paper across the diagonal so that you now have a triangle with a fold along the bottom.


3) Fold your paper in half continually until you get all of the fold lines shown below:


You'll just use the fold lines as guidelines so once you're done unfold back to your triangle shape.

4) Fold along line #3, matching lines 2 and 5.


5) Fold everything to the left along line #5.


6) Keep wrapping the paper around towards the back.  You should get a small tail sticking out at the top right side.


7) Just wrap that little tail around to the front and tuck into the fold to secure everything in place.


Now just slip your knife into the pocket that you've created.


This is a great way to use up those small scraps of paper you've been keeping, or for those cute little 6X6 pads of paper that you have stacking up in your closet.


Do you take your lunch to work?  Any special tips?  Leave a comment below~

Linkwithin

Related Posts Plugin for WordPress, Blogger...