Showing posts with label Gazing Ball. Show all posts

Friday, June 1, 2012

Garden Gazing Ball II

Do you remember my Garden Gazing Ball project?  Don't worry, it's highly unlikely that you do.  It was only my second post ever and my very first tutorial that I ever did.


I didn't really know what I was doing out here in blogland but I felt like I really had to share that project for some crazy reason.  And now, almost 2 years and 400 posts later, I'm still here!  Yay!
So, I was motivated by next month's Motivated Monthly party (Garden Projects), a bit of nostalgia, and a larger light fixture and redid my project from two years ago.

Here's all you need:


Steps:
1) Wipe down your light fixture so that it's clean and dry.

2) Paint a small portion of your light fixture with some Mod Podge.

3) Adhere your images, (I'm using leftover butterflies from my Butterfly Overload project) adding a layer of Mod Podge over top as you go.

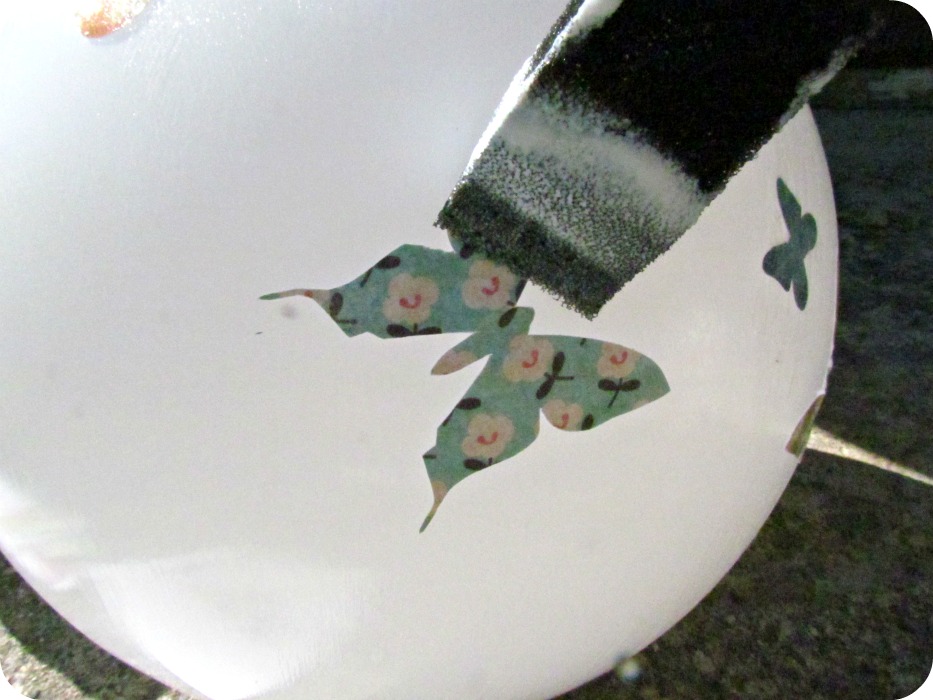
4) Keep going around your whole fixture until it's fully embellished.

5) And now for the fun part! Add a second layer of Mod Podge using SPARKLE Mod Podge to seal in and protect your images from any cold wet weather, and to add some sparkle that will catch the rays of the sun.

I didn't do this step with my first globe but I sure wish I had~


There you go!  That's it! Once it's dry....set it out in your garden or flower bed!

Garden Gazing Ball, How to make a garden ball, how to make a gazing ball, light fixture recycle, Make your own garden ornaments, Mod Podge, Butterflies

I haven't done this but if you're having an outdoor get toegether I think it would be pretty if you put a light inside and line up a whole bunch of them!  Maybe those battery operated tea lights?
Garden Gazing Ball, How to make a garden ball, how to make a gazing ball, light fixture recycle, Make your own garden ornaments, Mod Podge, Butterflies, handmade garden decor, garden crafts

That's it!  It was easy the first time and even easier this time!  Make sure to check out the original post and let me know what you think.  Am I getting any better at this blogging stuff?

Happy crafting everyone!

This project was featured here:

      A Crafty Soiree 

Saturday, August 28, 2010

Garden Gazing Ball

Well, I spent most of this week sewing like a crazy woman and trying to figure out how to take pictures of myself in the outfits without looking like a total weirdo.  You can check out some of my attempts here: Etsy photos .  I'm trying a new technique where I cut my head off.  I'm not very comfortable in front of a camera so this method seems to be going a little better.

Eventually I managed to turn my attention away from photos of me because we had beautiful weather here this week, which led me back out to my garden.  I've noticed a few cool 'gazing ball' projects on other blogs and I figured this was something that my own garden has been lacking.  The other projects were all created with used bowling balls (see: Cap Creations and My Repurposed Life) .  However, used bowling balls are pretty rare around these parts.  So, I headed out to our local Salvation Army Thrift Shop and found a great substitute.....an old light fixture cover.

Here are the supplies I used:

This project is so simple and took about 10 minutes to complete (minus the drying time).

Step 1: clean the light fixture
Step 2: apply stickers or decals (I used the left over bits from a window decal sheet I had)
Step 3: plaster it with Modge Podge.
Step 4: let it dry

And here's the final result as it dries in the sunshine!

I'm pretty pleased with it.  The Modge Podge gives a nice swirly effect that catches in the sunlight.  I might try another one with more sparkly stickers.  Try it out and let me know what you come up with!

T.

Coming soon: Inspiration boards~

Linkwithin

Related Posts Plugin for WordPress, Blogger...