Showing posts with label Christmas. Show all posts

Thursday, December 25, 2014

Feliz Navidad

Hands down, still my all time favourite Christmas song of all time!


Have a wonderful Christmas Day everyone~

Tuesday, December 23, 2014

Christmas Crafting

Only a couple of more days left for Christmas crafting.  If you're looking for an easy, last minute project try one of these! (links below)


1. Easy Felt Stocking            2.  Personalized Party Glasses          3.  Last Minute Gift Boxes


Wednesday, December 17, 2014

Bubble Light Holder

I can't get my Christmas tree lights to co-operate, but I can still enjoy my bubble lights!


One of my favourite parts of Christmas when I was a kid was when my Grandma would put out her bubble lights.  They were like magic to me.

I suppose they're meant to be put on a tree, but my Grandma always lined them up in the window behind her Christmas village so that's how I like to display them now too.  But that can be challenging when they look like this....


So, I came up with a wonderful recycle project that makes life with bubble lights much easier!

Materials:
-Bubble lights
-empty Christmas wrap tube
-craft knife
-pencil and measuring tape

Steps:
1) Count out how many lights are on your string and make the same number of markings on your tube, equal distance apart.


2) Use your craft knife to cut holes at each of your markings.  The holes should be big enough for your light bases to fit snugly.


3) Now just take the lights out of the sockets and set them aside and then ease the cord into the tube, pulling up the sockets into each hole.


4) Place the lights back in the sockets.


That's it!  I just set mine up on my window sill and threw some fake greenery on top to cover the tube.  You could paint the tube to help camouflage it even more but I found that this step wasn't necessary (plus I was throwing a party in a few hours and didn't have time for paint to dry).


Turn on your lights and watch the magic happen!  Bubbles everywhere!


Do you have bubble lights?  How do you display yours?  Leave a comment below~

Friday, December 5, 2014

Wine Glass Tags

When everyone comes over for Christmas, there is inevitably a point in the evening where someone says "Hey, you're drinking my drink!" or "Hey, who stole my drink?!?".  So this year everyone's getting wine glass tags when they come to the bar.


I made mine with my Silhouette machine but with a little patience you can easily do this without a cutting machine.  Here's what you need:


Materials:
-Special Occasion paper and plain paper
-Glue runner, scissors
-markers or sketch pens
-if you're not using a cutting machine you can use a template or some other small round object to trace

Steps:
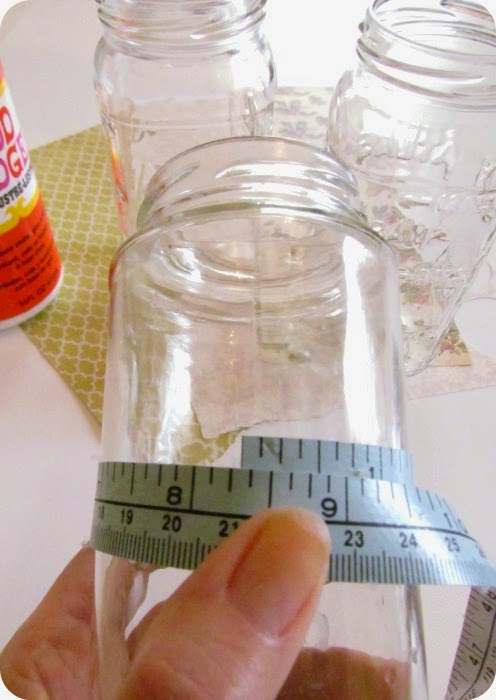
1) Create a circle shape about 2 3/4" round.


2) Create another smaller circle just inside and off centre.


3) Make a copy of this shape, group it, and set it aside.

4) Now create an overlapping rectangle across one side of the large circle, overlapping edges.


5) In the modify toolbox, click on the Crop button.  The will leave you with only the piece that was overlapping.


Now these next few steps are going to seem a little repetitive but this is how I usually operate when using my sketch pens and cutting.

6) Copy enough of your weird little shape from step 5 for the number of tags you want.  Using your text tool write the names of your guests inside each one.

I'm using the font :Gentle Touch
7) Now go back and delete all of the outline shapes.


8) Load up your favourite Sketch pen and send to Silhouette for printing.

VERY IMPORTANT: DO NOT MOVE YOUR MAT AFTER MACHINE IS DONE SKETCHING.  Leave your mat in place and do not take it off the machine.

9) Hit undo until your screen looks like it did in step 6.  Now delete all of the names.  Replace your sketch pen with your cutting blade, and send to Silhouette for cutting.


10) Don't forget to cut out all of your base circles from some pretty Christmassy paper.  Then just glue the pieces together.


11) I know what you're thinking...how the heck do I get this on a wine glass?  Easy, just make a little snip in between the two circles.


Now you can really go to town and ink the edges or add glitter if you want, or you can just add them to your wine glasses as is.  If you have a few beer drinkers at the party, steal some of this colourful little loom elastics from the playroom and attach a tag to a bottle that way~


You can make some extra blank ones for those surprise guests and just write names on with a marker.  Or you can really make it fun and instead of names write some Christmas trivia on the front with the answers on the back.  Get creative and have fun with your tags~

Check out my other fun (and very popular) wine glass project HERE.

What will you put on your tags? Leave a comment below.

Wednesday, December 3, 2014

Practical Christmas Cards

This year for Christmas cards I thought I'd try something a little different...a little more practical:

This is Silhouette design #67747 by Lori Whitlock
I love that this card contains something that's actually of use, cute little tea lights!


For the top 2, I used some papers from my stash.  For the bottom 2, I cut up some Christmas cards from Christmases past. See, this is my problem with cards....how long do you keep them?  What do you do with them afterward?  At least these 2 got put to use again~


You can see here that the top part opens up. I haven't put my sentiments in there yet but hopefully I will before Christmas rolls around.

I found that I had to enlarge the design about 1/4"  to fit the tea lights.  Maybe tea lights are different sizes in different countires?  Who knew?  The design also comes with several Christmassy embellishments that I didn't use.

You could add some acetate to the front window but I didn't want it looking like it was purchased so I left it open.  The glitter tea lights are from the dollar store.

Do you still give Christmas cards every year?  What do you do with yours at the end of the season?  Leave a comment below~

Wednesday, November 19, 2014

Christmas Ball Garland

Last week I decided to start putting some of the ideas on my Pinterest Boards to work.  First up, a Christmas project....

I pulled out this big container of 100 coordinating Christmas balls that I bought at a Boxing Day sale a few years ago.  I really didn't need to buy more Christmas decorations but they were on super duper sale so I couldn't resist.


Then I followed the tutorial I pinned ages ago from Upside Down Grace.  This project is beyond easy and can be finished while watching TV.

I wasn't sure how long 100 Christmas balls would get me.  I thought I could make my garland long enough to drape down my banister but no go.  So it ended up on top of mantle~


I added a little cheap greenery underneath and some tea lights behind and now it has a sort of magical glow.


Right now I've also got my Christmas Luminaries up on each side but I'll probably add a banner and few more bits and bobs from now until December.


Have you started decorating for Christmas yet?  Maybe it's just a blogger thing?  Leave a comment below~

Friday, November 7, 2014

Christmas Top Refashions

Almost every year I seem to end up buying one sparkly sweater or top just to wear for Christmas celebrations.  Then it sits in my closet the rest of the year.  Do you have a pile of those tops?  Well, today we're going to put them to use!


I found these holiday type tops for next to nothing, and instead of wearing them for one or two nights this Christmas, I'm putting them on my couch for the whole season.


The gold one is a sort of velveteen and the reddish one is crushed velvet.  I'm not sure how flattering these would be on anyway so I don't mind cutting them up~

These cushions require minimal sewing so they're easy to whip up, even for beginner sewers.

Steps:
1) Lay your top out on a flat surface and cut straight across as shown below.


2) Turn your cut piece inside out and stitch along the bottom.

3) Turn your cover right side out and attach 4 pieces of ribbon to act as tie closures.

This way you can easily take your cushion
out and use without the cover after the holidays~

That's it!  just a few stitches and your done.


The next cushion is a little different, but just as easy.

Steps:
1) Again, lay your top out flat and cut straight across under the arms.


2) Same as before, turn your cover inside out and stitch along the straight edge bottom.

3) I wanted to take advantage of the curved hem (which is now the top of my cover).  I put my cushion inside and simply folded it over the top and stitched on a beautiful button.


You can still take this off after the holidays with an easy snip of the thread holding the button on.


That's it!  2 holidays cushions for your guests to relax on in just minutes.


Look at that! They even go with my sequined Butterfly Cushion.

Confession time....how many holiday tops do you have in your closet that you never wear?  Leave a comment below~

Friday, October 31, 2014

Christmas Luminaries

Christmas crafting?!?!  If you're a fellow blogger you're probably wondering what's taken me so long to get into the Christmas spirit.  If you're someone who just reads blogs, you're probably thinking it's Halloween today?!?!  Why is she making Christmas projects?!?!?

But here in Blogland it's been Christmas for quite some time, so I thought I better get with it.


Here's what you need to make your own quick and easy Christmas luminaries:


Materials:
-glass jars
-Mod Podge and sponge brush
-pretty papers
-measuring tape
-cutting machine or scissors/craft knife
Optional: Sparkle/Glimmer Mod Podge

Steps:
1) Clean out your jars and remove all of the labels and glue.  Then measure the distance around the body to see how long to make your cut out design.

overlap just a bit so that you
don't have any gaps in your design
While you're at it, measure the maximum height of the body of the jar to determine the height of your design.

2) Use your cutting machine, or freehand, create your cutouts.


I used my Silhouette and made 2 wintery Christmas designs and one with, of course, butterflies.


I made the butterfly design myself~

3) Slap a good layer of Mod Podge onto your jar.


4) Adhere each paper cut out to a jar.  Add more Mod Podge on top to secure everything.


5) If you want to add just a little extra something, add a layer of Sparkle Mod Podge on top.  I had some Martha Stewart glitter decoupage glue in my stash so I decided to try it.  It's not bad, but I found that it wasn't enough.  I went back over it again with Mod Podge Sparkle (the pink label).  The Mod Podge glue has a much bigger sparkle/glimmer factor.


Let everything dry overnight and then just drop a candle inside and watch the magic happen...


I can't capture the glitter in a pic but it's so pretty.  It looks like snow falling down on the trees.  And I love how the birch tree cut outs glow.


Yay!  1 Christmas craft down, countless more to go.  Have you started Christmas crafting yet?  Leave a comment below~

Linkwithin

Related Posts Plugin for WordPress, Blogger...