Friday, November 29, 2013

Glitter Votive Holders

I didn't tell you but I've been off partying the days away in Las Vegas this whole week...the land of sparkle and glitter, so today's tutorial fits right in!


Here's what you need to make your own Glitter Votive Holders.


Supplies
-Mod podge and sponge brush
-Glitter
-Tartlet pans (I picked up this pack of 7 pans for 99 cents at the second hand store!)

Steps:
1) Give the inside of your little metal pan a generous coating of Mod Podge.  Make sure to get into all of the nooks and crannies.


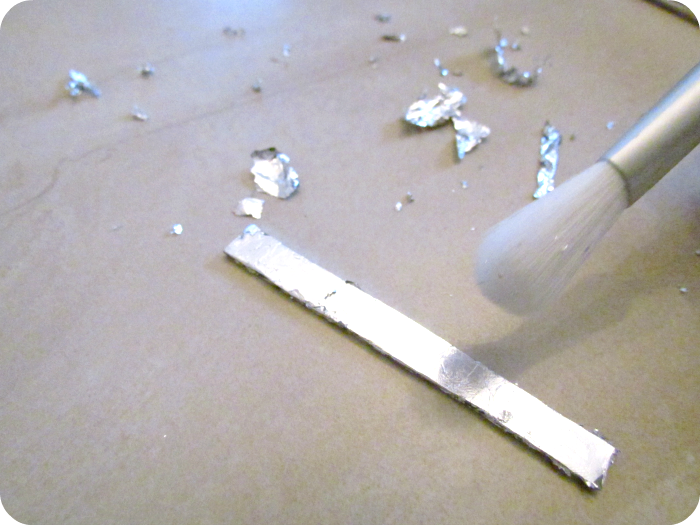
2) Put down a piece of scrap paper and then add a generous amount of glitter to the inside of your pan.  Now rotate and tap it from the outside to make sure that once again, you get every nook and cranny.


Tap the pan from the outside and gather all of the excess glitter onto your scrap paper to funnel back into your glitter jar.  Don't let any of that beautiful stuff go to waste!

3)Optional step: Once your piece is dry, add a second coat of Mod Podge on top to make sure it all stays in place.  Wait until it's dry or else you'll just end up moving the glitter below around, exposing the tin cup.  Don't ask me how I know this~

Try all different colours and shapes!


4) Now just add a nice smelling votive candle and place on your dinner table or mantle for a gorgeous holiday effect!


If you have small children in the house use the battery operated flameless votive candles.  You'll get the same effect.

So easy, but so pretty!  Are you getting ready for the holidays yet?  I talked to someone who had her tree up 2 weeks ago!  Mid November is a little early for me.  How about you?  When do the Christmas decorations start showing up in your home?  Leave a comment below~

Check me out on Instagram for pics from my trip to Las Vegas!

Thursday, November 28, 2013

Tell a Tale - Girls Who Read

Something a little different for Tell a Tale today~


You can learn more about this wonderful man HERE.

Are you a girl who reads?  How do you share your favourite books with others?  Leave a comment below~

Wednesday, November 27, 2013

Christmas Apron

My mom was teasing me a few weeks ago about not having an apron for some reason.  Luckily, I was got a great Christmas apron panel from Wholeport this month and was able to make one!


Panel's are great for no fuss projects.  I considered finishing the edges with bias tape and adding some glitter fabric paint, but in the end, I just rolled over the edges and followed the directions (which are printed on the panel).


Best of all...if you want to make your own, they're only $5.49 each! (I think there's another one with green as the background).
Just cut around the edges, fold everything over a couple of times,
and then put the pocket and ties on.
Couldn't be easier~
Wholeport has all kinds of things to help you get ready for the holidays.  Come back tomorrow and I'll show you what else I got this month!

Do you use an apron when you cook or bake or is it an old fashioned thing?  Leave a comment below and then read the poem "Grandmother's Apron", see if it bring back any fond memories~

This project was featured here:


Tuesday, November 26, 2013

Vogue Holiday Patterns

The holiday patterns books are out!  Here are some of my favourite patterns that I found in the latest edition of Vogue:

Love this cute dress.  It would be perfect to go from the office to a get together afterwards~
V1368
 So wishing I had a party to attend that deserved a dress like this one.
V8943

In this coral colour, this dress isn't all the Christmassy, but imagine it in a beautiful deep read.  Perfect!
V8945

Love this cute little shrug to wear over a little sparkly top for New Years~
V8965
Flip through the whole Vogue lookbook on ISSU here~

Monday, November 25, 2013

Movie Monday - Purple Rain


This just might be my favourite version of this song~


The man singing performs under the name Dred Scott.  To learn more about him click HERE.

Friday, November 22, 2013

Faux Silver Pendant

Today's project is great either for yourself or as a quick and easy stocking stuffer.

polymer clay silver pendant, DIY silver pendant, DIY jewellery, DIY clay jewellery, silver leaf


Here's what you need to make your own~


Materials:
-Polymer clay
-Silver leaf
-craft knife
-optional:
   -pasta machine for flattening clay
   -soft brush
   -straight edge

Steps:
1) Condition your clay by warming it up in your hands and rolling it into a soft egg shape.


2) Run it through your pasta machine (used for clay only, not for food) on the thickest setting.  If you don't have a pasta machine for crafting just roll out your clay until it's about 1/8" thick or so.


3) Lay your flattened clay piece down on a cutting surface (I like to use a ceramic tile but anything will do), and cut it into a long skinny rectangle.

I may need a new 'straight edge'.

4) Tear off a piece of silver leaf and gently lay it on top of your clay rectangle.  Using a very soft clean brush gently brush it into the clay.


5) Use your knife to cut off the edges and then turn it over to do the back.


If your leaf splits or breaks don't worry about it.  Just lay another piece down and keep brushing until it blends into the other pieces.  It doesn't have to be perfect, that's part of the beauty of the piece.

6) Now, very very gently roll one end around a pencil or other smallish object to create a loop on one end.


The silver leaf will start to crack.  Don't freak out.  You can either just leave it or add more silver leaf on top and continue to brush it in.

7)  If you just want a nice plain bar, bake your clay piece in the oven following the directions on the clay packet.  If you want to add an extra special touch and you have a stamp that has lettering, you can personalize your piece to make it look like it's hammered.

"Love" & "Mom"

Once your piece is baked the silver is baked right onto the clay.  It shouldn't come off.  If it does though, you can seal your piece with some Mod Podge or Double Coat.  Either one will dry clear.


Don't worry if your loop at the top doesn't fully close.  As long as you aren't jumping on a trampoline or surfing, gravity should take care of holding things in place for you.

What would you print on your pendant?  Leave a comment below~

This project was featured here:

Adorned From Above  WP button250x250

Thursday, November 21, 2013

Tell a Tale: Bright Young Things


Fall in love with the Jazz Age in this book.

7719248

Summary (from Goodreads): The year is 1929. New York is ruled by the Bright Young Things: Flappers and socialites seeking thrills and chasing dreams in the anything-goes era of the Roaring Twenties.

Letty Larkspur and Cordelia Grey escaped their small Midwestern town for New York's glittering metropolis. All Letty wants is to see her name in lights, but she quickly discovers Manhattan is filled with pretty girls who will do anything to be a star....

Cordelia is searching for the father she's never known, a man as infamous for his wild parties as he is for his shadowy schemes. Overnight, she enters a world more thrilling and glamorous than she ever could have imagined — and more dangerous. It's a life anyone would kill for...and someone will.

The only person Cordelia can trust is ­Astrid Donal, a flapper who seems to have it all: money, looks, and the love of Cordelia's brother, Charlie. But Astrid's perfect veneer hides a score of family secrets.

Across the vast lawns of Long Island, in the ­illicit speakeasies of Manhattan, and on the blindingly lit stages of Broadway, the three girls' fortunes will rise and fall — together and apart. From the New York Times bestselling author of THE LUXE comes an epic new series set in the dizzying last summer of the Jazz Age.
A flapper~
Doesn't it make you want to cut
off all your hair and throw on a sequined dress?
Review: I enjoyed being taken back in time to the 1920's in this novel. Even though the storyline was fairly simplistic and I couldn't really connect with one of the main characters I still want to continue with the series to find out who, as the prologue ominously puts it, becomes famous, who gets married, and who dies.

The setting of the jazz age with all of its excesses and beautiful fashions will draw you in immediately. I have a hard time with Cordelia though. I can't imagine anyone in the real world having such out of whack priorities and being so utterly selfish. That being said, each of the thee main characters leads such fascinating lives I think the author could've written an entire novel on each one alone.

I'm looking forward to returning to flappers, cigarette girls, bootleggers, and parties till dawn just as soon as I find book number two.  Just a note...this is a Young Adults novel.  I knew this going into it but the lines between genres are so blurred these days I thought I'd give it a go anyway.  This could be why the main characters are not overly developed and why one of them is more than a little boy crazy.


Have you ever read a young adults novel?  What's the difference?  Did it open you up to new authors?  Leave a comment below~

Wednesday, November 20, 2013

Etched Jar Candles

Last week I showed you how Martha Stewart Crafts is helping me get ready for Christmas with my Surprise Candy Dish.  There were so many other fun products in the box though that I had to keep crafting...and that means that you get a bonus tutorial this week!


Here's what you need to make your own Etched Jar Candles:


-Jar Candles (You can make your own but I have loads of these large candles from Michaels so I grabbed a couple from my stash)
-Martha Stewart Glass Etching kit
-Martha Stewart Adhesive stencils
-embellishements and ribbon
-not shown: scissors and pop dots or other adhesive

Steps:
1) Remove the label from your candle.  I was surprised at how easily this one came off.


2) Place your adhesive stencils onto your glass jar.  I love that these are reusable and can be adjusted in case you want to move things around.


3) Using the brush in the Etching kit, just glob on the etching cream nice and thick.  Make sure to cover all the areas that you want to show up as etched.


4) Let the etching cream sit for about 15 minutes or so and then just run it under a tap and wipe it all off.  At first you'll think nothing happened, but remove your stencil and voila!

I like how detailed the stencils are~
5) This is a very subtle effect on these candles so I added some ribbon and little poinsettia embellishments.


I even grabbed a couple of mini candles and did them too!


These would make nice hostess gifts or little game prizes.  They look like you spent ages making them but really they take less than 30 minutes from start to finish.

You can get the entire Martha Stewart Craft line at Michaels or in Plaid's online store.  With so many choices in craft and glass paint and the new decoupage line your sure to find everything you need for your handmade Christmas needs.

For etching and decoupage ideas from other bloggers check out these projects:
And for even more inspiration, visit Martha Stewart's Pinterest Board!  You can also find more ideas on the Plaid Facebook page or sign up for their newsletter HERE.

*This is a sponsored post written for Blueprint Social for Martha Stewart Crafts.  No compensation was received other than the products shown and all opinions are my own.

Tuesday, November 19, 2013

The Paradise

A couple of weeks ago I told you about Reign, a fun and not so historically accurate period drama set in the 1550's.  If you enjoy stepping back in time but want to take more of a baby step, then you should watch The Paradise!

The Paradise

The Paradise is based on a novel by Emile Zola and is set in 1875 in an English department store.

The main character, Denise, is from a small country village, but when she lands in the big city and gets a job at the new department store "The Paradise" we find out that she's full of big ideas that land her squarely in the spotlight, sometimes for good, sometimes not.

Denise and her nemesis Clara.
There's intrigue, romance, great costumes, and some pretty awesome characters.

Mr. Moray owns the Paradise and has that je ne sais quoi that all the girls love, especially poor little rich girl Katherine Glendenning.

Katherine has the most sumptuous
dresses but they always seem to me like she had some extra
upholstery trimmings laying around and stuck them on her dress.

If you love Downtown Abbey, and got hooked on Selfridges when it continued to feed our need to historical drama during DA's hiatus, then you will definitely enjoy The Paradise too.  The familiar themes of the great divide between the classes, loveless marriages, and the struggle for women to have their voices heard, carries on through all of these characters.


Oh BBC!  What will you come up with next?!?!


Linkwithin

Related Posts Plugin for WordPress, Blogger...