


You can purchase bunny shapes for your Silhouette cutting machine from the online store, but I found that it was just as easy to make my own.
All you need is the Silhouette software and machine and some pretty papers.
Let's start with the basic bunny shape and then I'll show you what you can do with him
Steps:
1) Start with a basic circle. This can be any size, you can always shrink or expand the shape once you've completed the whole thing if you want.
 |
| This will be the head. |

3) Now we need to add some ears. Use your circle button but don't hold down the shift key. This way you'll be able to make a nice long skinny oval.

4) Use the mirror right button to make the other ear.


IMPORTANT:
Before you start the first project make sure to make a copy of the shape above and set it to the side.
Bunny Card
Steps:
1) Using the replicate button, copy the shape two times to the right and then move them over just slightly so that they're overlapping on the sides.


6) Now just move the inner bunnies off the page so that you can cut the background piece from some plain cardstock.
7) Move the background out of the way and cut the inner bunnies from some pretty printed paper.

8) Using your favourite adhesive, glue the pieces together and fold down the middle.

9) Use a pompom or a cotton ball to add some cute little tails and just add your sentiments inside~


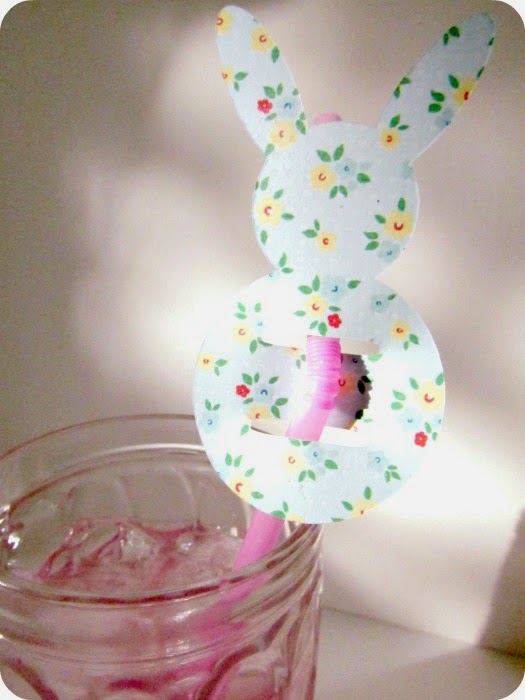
Straw Holder - Once you have your bunny shape completed this project couldn't be any easier.
Steps:
1) Remember that little bunny copy that you put to the side earlier? Now is the time to pull it out into the spotlight. Now just use your oval tool to add two little slits in the body of your bunny, group it, and you're ready to cut!


Leave a comment below~

3 comments:
Those bunnies are adorable....love the mini-prints you used, too!
The straw holder is such a cute idea. I love that bunny design before it is folded into a card. Sort of an abstract rabbit!
I don't have a sihouette, but a girl can dream...lol. Someday when I get one, this tutorial will come in handy.
Post a Comment