Friday, April 1, 2011

Braided Bracelet

On one of my many work trips this past month I was lucky enough to spend some time at the West Edmonton Mall.  For those of you not in Canada, West Edmonton Mall is a shopper's haven.  It's the largest mall in North America with over 800 stores and services along with a wave pool park, hotel, ice rink, amusement park and more.

While I was there all of the stores had their spring stock out and I was so happy.  Everywhere I looked there was a definite hippie bohemian vibe with lots of peachy tones and earthy greens, two of my very favourite colours.  Of course, I bought a few things and was inspired to add an accessory to my new spring wardrobe!

Here are the supplies I used:

Add some jewellery glue if you have it.
Steps:
1) Thread three embroidery threads through one hole in a separator bar and tie a knot, leaving a tail of at least an inch on the outside.


2) Braid the embroidery thread the length you need to fit around your wrist.

I found it easiest to secure it first so I could use both hands to braid.
3) At the end of your braid, thread the tail end of the thread through another separator bar and tie another knot.  Don't worry about cutting excess thread yet unless it's really getting in your way.


4) My separator bar had five holes so I repeated these steps four more times, moving to the next hole each time and changing up the combination of thread colours.

Mr. Whiskers found this whole process very fascinating!


 5) Now came the most time consuming and frustrating part.  But really that was only because I had to do a bit of trial and error until I figured out a good solution.  I was going to use these little butterfly clips to gather up all of the threads and then hook onto a jump ring.  The problem was that they were far too small, I had too many threads to contend with, and I didn't have any larger ones on hand.


Eventually I found something that worked.  So, first trim all of your threads so that they're the same length, leaving about 1 inch in length.


 I tried to do this next step without glue but I just about tossed the whole project.  If you have nerves of steel and a larger clip you can do it, but I recommend adding some glue to the tips of the threads and sort of gathering them all up together, as well as a few dabs inside the clip to hold it all in place while you're trying to clamp it shut.
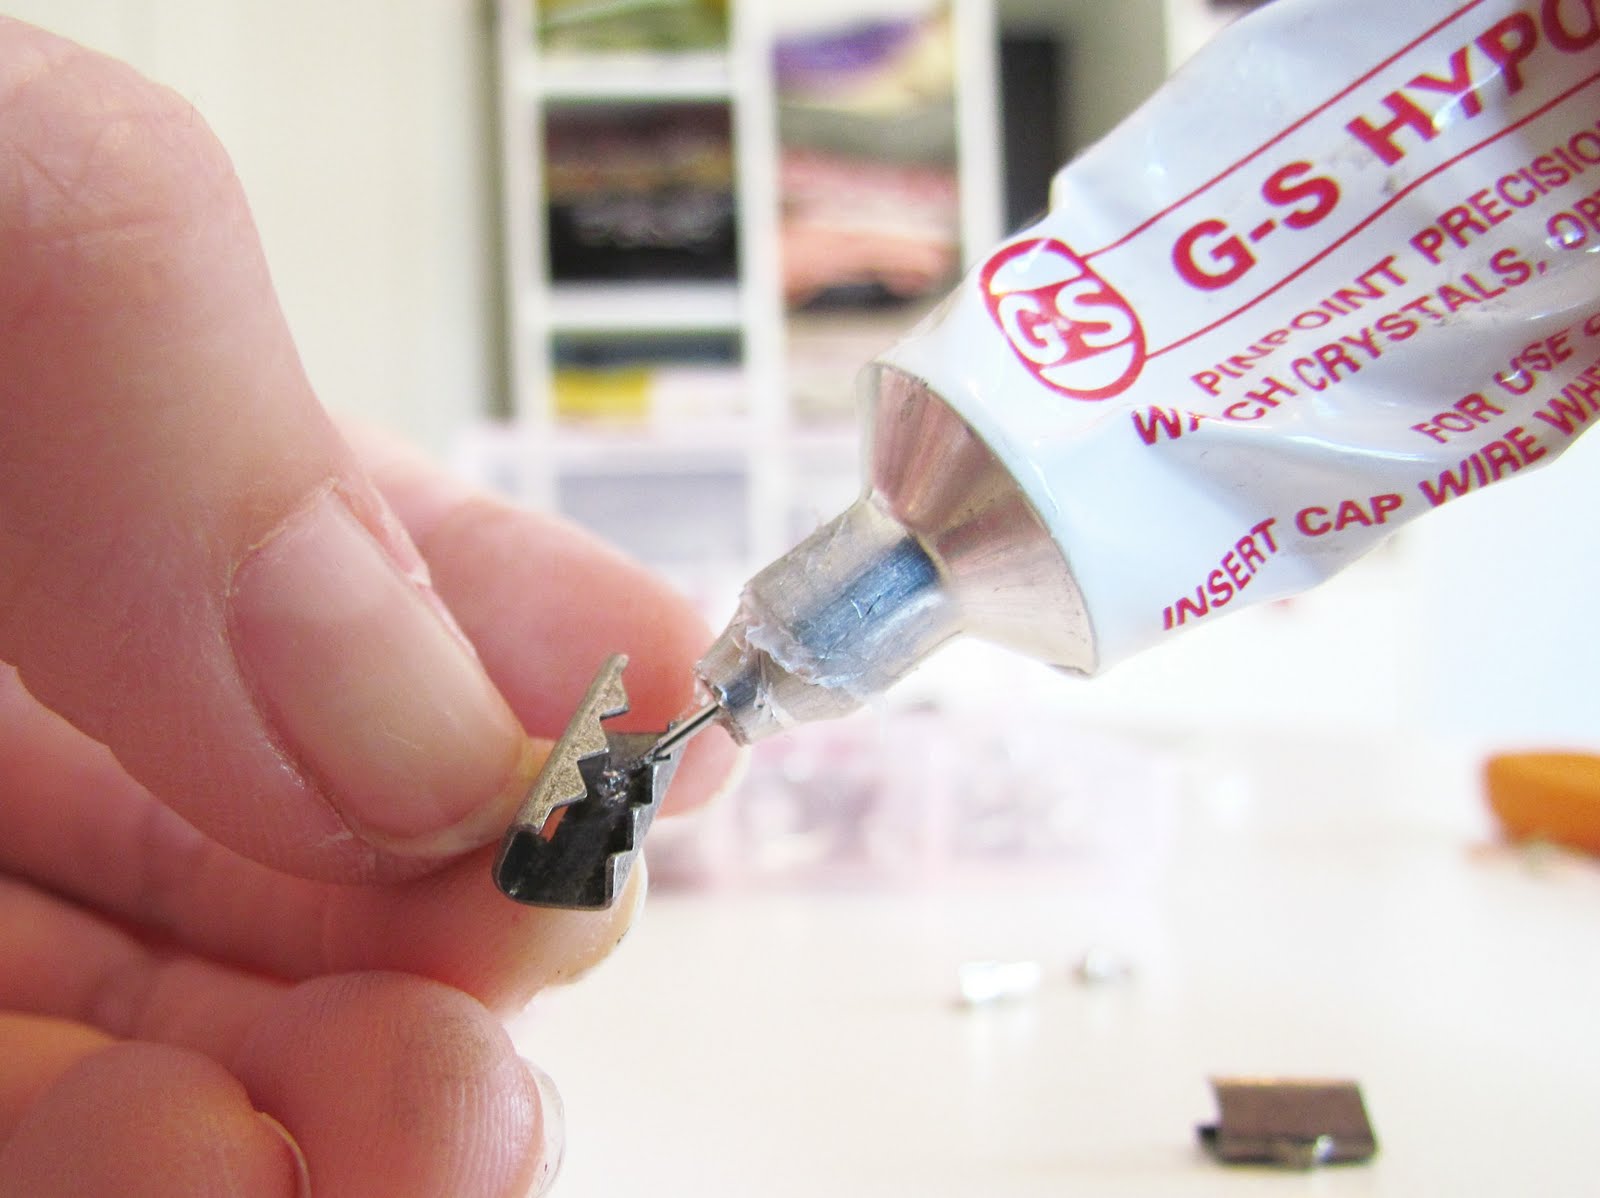

I had to search high and low for my jewellery hypo cement glue but eventually I found it.  It's very strong smelling and once it's on your skin, everything sticks to you.  You could try hot glue but I'm not sure that would be any easier to work with.  Despite it's bad qualities, the hypo cement glue really works.

6) Now just carefully guide all of your threads into the clamp and using some pliers squeeeeeeeeeeeeze it shut.


Ideally I would only have one on each end gathering up all of the threads, but the clamps I had on hand were small, so I had to separate the threads into two bunches.

7)  Add a jump ring to each clamp.


8) Connect the two jump rings on each end with another jump ring.


My fingers are now coated in glue~
9) Connect a clasp to the middle jump ring.  If you have a magnetized clasp that works best on bracelets.


All done!


Once I got the hang of gluing the threads into the clasps it all went pretty smoothly.  I have really tiny wrists and I always end up making bracelets a bit too big so this might be something I give away to someone I know.  I might make myself another one using all the same colours or add some beads or something.  I'm not sure yet.  I love embroidery thread because it comes in such a huge array of colours and textures so the sky is the limit~ 

Have fun with this and let me know if you try it out.  Leave a comment below.

As usual, I'll be posting at linky parties throughout the week so make sure to check out the tab up top.  And don't forget, if you're a follower you can post your button on the "Follow My Friends".
Every month I'll do a feature on one of my new friends!

Have a great week!

Thursday, March 31, 2011

Inspiration Shot: It's Melting!!!!

This isn't a particular beautiful shot but when I saw these giant icicles I felt something I haven't felt for awhile....hope!  Hope that all of the snow is finally going to go away someday soon!


Now all the sun has to do is work it's lovely magic on the rest of the back yard and I will be a very, very happy girl...


Is it snowy where you live?  Are you like me and counting the days (hours and minutes) until it's all gone or will you miss it?

Wednesday, March 30, 2011

Show and Tell: More Beaded Jewellery

Do you remember way way back (last September) when I showed you some of my beaded jewellery projects from the past?  Well, I didn't show you everything.  I was really into jewellery making for a few years and made loads and loads of pieces.

Here's a fun necklace that anyone can make:

Beaded jewellery, beaded necklace, easy beading, pink beaded necklace, DIY beaded necklace


I just strung up several strings of seed beads and added a few chunkier ones to add interest.  I didn't get all caught up in worrying about symmetry (very unlike me actually) and just let it come together on its own.

This bracelet, on the other hand, is very symmetrical and measured out:


I'm still getting used to my new camera so these shots aren't super great but hopefully you can see the interlocking circles.  There are three rows of linked circles in pink that interlock with two rows of the same in white.

I don't think I ever wore the two pieces together (at least I hope not) even though they use many of the same beads.

Leave a comment and let me know your thoughts.  Have you ever had a hobby that took up all of your time for awhile that you suddenly forgot about?  I feel like this is what happened with my jewellery making.  I still use many of the skills I learned but I don't make complex pieces like I used to.  Maybe I'll get back into again...someday~

Tuesday, March 29, 2011

Hidden Treasures: ROY G. BIV

If you're not part of the Etsy community (yet), you're missing out on an incredible place that is totally committed to the art of the handmade.  It's a wonderful place to find everything you need, or just want, while supporting fellow crafters and artists.  It's also just a treasure trove of  great ideas and inspiration.

For something new this year I thought I'd post a treasury of various Etsy sellers each week.  Click on the thumbnail to visit the shops and see what else you can find.  And while you're hanging out at Etsy you can feel free to visit me at the Etcetorize etsy shop~

'Roy G. Biv' by Etcetorize

An Etsy rainbow of creativity~

Red Cotton Twill Lines ...

$39.00
Blood Orange Lip Balm

$3.50
Sunshine Yellow Swarovs...

$20.00
Reserved for Kim Infini...

$
Jewelery necklace of be...

$1.00
Hello Sugar - Organic O...

$5.50
Green leather passport ...

$24.00
Vamporium: Baby Blue Cr...

$65.00
Goldenrod - Handpainted...

$14.95
Spring Green Chunky Bea...

$58.00
Handspun bluefaced leic...

$32.00
Blue Flower Photograph ...

$10.00
Kelly Green Peony flowe...

$2.00
Sky blue mini journal w...

$12.00
Estate Style Vintage Ea...

$16.00
FREE SHIPPING SALE - Al...

$195.00


Friday, March 25, 2011

Blingy Cushion

If there's one room in my house that is sadly in need of some sparkle and blingity bling it's my living room.  I've bought some fabric to make new curtains but thought I'd start with something a little smaller this week just to add that first spark.

I recently bought this cute Tee on the clearance rack at Winner's and decided to use it as my inspiration:


Here are the supplies that I used:
Steps:
1) Measure your cushion and add a half inch to all of your measurements.  Cut out two pieces of fabric the same size. 


2) Create a template for the design you want to put on the front of your cushion.  I traced an outline of the butterfly from my top for my basic shape:


Check out how I made that cute pencil here .
3) Using a vanishing pen I lightly traced the image onto my cushion fabric:

4) I started with the outline image and hand sewed a single row of sequins on.  I used invisible thread so that the stitches wouldn't be very noticeable.  It's almost like a fishing line or beading thread.


If you have pets, this is a good time to let them outside.  The sparkle of sequins and the flash of invisible thread flying through the air might be too much temptation to bear for some of them:


Here's the outline of my shape:


5) Next I filled in the shape with more sequins.  I used different shapes and colours to add more texture and interest. 


I didn't try to copy the t-shirt butterfly.  It would've been too labour intensive.  Although this is a pretty easy project, it can become very time consuming.

6) Once you have your shape all filled in you just need to put your cushion together.  Simply place your fabric right sides together and pin on three sides, leaving one edge open to pop your cushion form in.  Sew together with a half inch seam allowance.


7) After it's sewn you can finish your edges with a zigzag or serger if you like.  Cut diagonally across all four corners so that they poke out when you turn it all right side out.


8) Turn your cover right side out and insert cushion form:


9) Pin your last unfinished edge and slip stitch or ladder stitch the opening closed.


And Tah Blingity Dah, you have a pretty cushion!

Butterfly cushion, DIY pillow, Glitter pillow, DIY Home Dec, Bufferfly Home Dec, Butterfly, DIY Cushion, how to sew a cushion, how to sew sequins, sequined butterfly

Try different variations.  If you want to try a simple version just do straight lines and then you can zig zag it all on with a sewing machine.  Or create bubbles of different colours.  Check out the sequin shelf at your local fabric store and go for it!

I'll be posting at all the new linky parties on the linky tab so be sure to check them out for more fun ideas.

Leave a comment below and let me know your thoughts.  What kind of shape will you use on your cushion? 


Linkwithin

Related Posts Plugin for WordPress, Blogger...