Pages

Wednesday, August 31, 2011

Very Easy, Very Vogue...Very Blah

Normally I love Vogue patterns, even the easy ones.  They usually have the detail and style that a designer pattern has without the $30 price tag.

The two that I'm going to show you today though....blah.  I thought they'd be a nice simple silhouette that would be perfect for the office but I doubt very much that I'll be wearing either one of these.

Here's the first one:


I made view A.  Simple, elegant, form fitting.


I was originally going to make the top piece in a solid bluey grey fabric that matches the floral print but changed my mind at the last minute.

I confess that I did wear it to a work event once but the only reason was because I had really long hair and was able to hide the back of it.


I actually had to make a little patch that I pinned across the top of the zipper on the inside so that my bra strap wouldn't show.  There is a hook and eye but it's murder to clasp it without it help.

This dress is definitely going in the 'not wearing ever again' pile.

I thought I could make up for that disaster with the next Vogue pattern:


Again, very simple, classic, and elegant.

But also not a very good fit.


I'm standing with my hands like that so that
I can take it in a bit.  I would probably look
funny if I walked around the office all day like this though~
It's not  quite as bad as the first one and I'll admit that I could take it in and that would at least help, but the truth is when I put it on it reminds me of a dentist smock for some weird reason.  Maybe it's that high round neckline. I never wear round necklines if I can help it.  Still, I can't get the dentist office image out of my head so I doubt I'll ever actually wear it.

I'm not sure if it's the patterns or just that this style doesn't suit my body type but I'm off the Vogue for awhile.


PS...don't forget that today is the last day to enter the Plaid Giveaway .  Make sure to get your comments in for a chance to win your own Extreme Glitter Paint set~

Tuesday, August 30, 2011

Get Lost... on YouTube

Don't you just love YouTube?!?!

I used to get lost for hours starting with Cat Stevens live concert footage and somehow ending up at an old episode of Fantasy Island via a few Solid Gold performances.


Lately, my YouTube travels seem to venture more towards beauty and crafting guru's.  Here are a couple of crafters who I stumbled upon and thought you would find interesting.

SalinaBear is a young woman from Vancouver who shows you how to cut up your old T shirts and apply weaving techniques to make a whole new top!


GiannyL is another beautiful young woman, from Ecuador, with loads of great idea on deconstructed clothes and making things from scratch without a pattern...what makes her videos even better is that she always does it to an awesome Latino hit song.


Both girls make their projects easy to understand and have wonderful and unique ideas.

Have fun getting lost on YouTube!

Monday, August 29, 2011

Don't forget to enter~

Don't forget to enter the Plaid Extreme Glitter Paint Giveaway~


Check out this fun tutorial I found on YouTube that uses Extreme Glitter Paint:


Go HERE to get your comment in by August 31st! 

Friday, August 26, 2011

Shabby Chic Frames

On one of my many trips to the local thrift store I picked up some small wooden frames for a whopping 50 cents each.  I had a fairly good idea of what I wanted to do with them but of course when push came to shove I was frozen with indecision on what colour palette I wanted to go with to create my vision.

I had something in my head with vibrant turquoise, yellow, orange, and pink.  Eventually I had to be honest with myself and admit that I'm just not that colourful, well, at least my home isn't.  So I went with a very natural, neutral, shabby chic vibe instead.

Here's what you'll need for today's craft:

A pencil will come in handy too.
Steps:

1) I wanted to cover the frames with the beautiful handmade papers that I had.  But the paper is very thin and I could practically see the wood grain right through it.  I figured that once I added glue it would probably thin out even more.  So, my first step was to give each of the frames a light painting with some wicker white.  I think this helped seal the wood a bit too so that the glue didn't just seep right into the frames.


2) Once your paint has dried, place your frame face down onto the paper and trace about 3/4" all the way around the outside and cut out your rectangle.


3) Next, measure approximately 5/8" from the inside frame and cut that out too.


4) Now comes the fun part...the Mod Podge!  Paint a layer of Mod Podge onto your frame and place onto paper.


5) Cut the corners of your paper diagonally to the edges of the frame (inside and outside corners). 


6) Apply Mod Podge to the sides and back of your frame.  Fold the paper over and secure with the Mod Podge.  You should get nice clean straight corners.


 7) Add another layer of Mod Podge to the top of your paper to fully seal it and give it a nice shiny finish.


8) Cover the rest of your frames to create a little collection.


 9) While I was waiting for the Mod Podge to dry I went to my computer and printed out some photos that I've taken in my garden.

10) Once your frames are dry, place your photos in the frames and replace the glass and backing.

11)  I hemmed and hawed over what to use as my hanger but in the end I used some pretty lace that I won from Marina over at Frabjous Couture .  (Ah!  So many choices to make~)

Measure out approximately how much lace you need to hang your frames by laying the lace on top, leaving enough for tails at the bottom and some length and a knot up top.


12) Flip your frames over, lay the ribbon or lace or whatever you're using, onto the backs of your frames, taking care to make sure everything is level and balanced.

And now for the goofy part.  I'm so unsure that this is what I want to use this lace for that instead of gluing it down I just used masking tape to secure it.  I just have this feeling that sometime in the future I'm going to be making a pretty dress or blouse, need some lace trim and think, if only I hadn't glued that lace onto those frames!


So, obviously if you're not as weirdly undecided as I am and don't treat every little crafting decision like it's a UN resolution, then just go ahead and use your glue gun or crafty glue and secure everything down.

13)  Cut your bottom tails on a nice angle.


And voila!  You're finally done!

DIY Frames, Mod Podge, Easy Crafting, kids craft, cover frames, paper frame

I like putting up stuff on tiny little walls like this in the hallway.  I think every wall should have at least one thing on it!


There are so many ways you could add your own touch to this project.  You could use scrapbooking paper or even fabric (careful not to add to much bulk or you won't get your glass back in).  Use ribbon or twine instead of lace.  Hang a 5 or more frames, put pictures of all of your family members.  The list goes on and on.  Give it a go and let me know what yours looks like!

Don't forget to enter the Plaid Extreme Glitter Paint Giveaway before August 31st!

Also, I've added some new linky parties to the tab up top so go take a look and check out some parties for loads more great ideas from blogland.

Have a great week everyone!

Thursday, August 25, 2011

Vintage Inspiration: Bikini Sizzler

As I've been going through all of my vintage patterns and posting them for sale over at Etcetorize Vintage Pattern Supplies I wonder with some of them if anyone will actually purchase them.

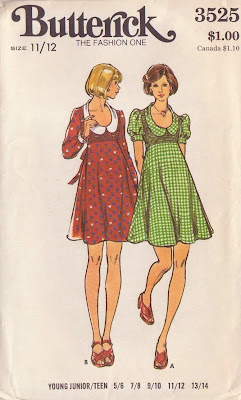
These patterns are sooooo cute, but honestly, do you think you could pull of a Bikini Sizzler???  I don't think I could.

Vintage Sewing Patterns, Mini-dress, HarajukuVintage Sewing Patterns, Mini-dress, Harajuku


Vintage Sewing Patterns, Mini-dress, Harajuku

So, today's modern take on these patterns comes from Japan.  You got it...the Harajuku girls!

Meet Gwen Stefanis Harajuku Girls at Bloomingdale’s

Now stick with me, if Gwen Stefani and her friends can do it, why not you???


The pic above is of an British celebrity named Cher Lloyd.  I'm afraid I don't know her but she seems to be pulling off the Harajuku vibe without going overboard.

Just picture the Bikini Sizzler or the Baby Doll in some bright colours with contrasting trim and you're well on your way to hanging with Gwen!

Oooooorrrrr, if Harajuku just isn't your thing and you don't have a date with Skating with the Stars in your near future you could just lengthen the skirt part of the dresses.  It's not quite as exciting but ít's probably far more doable.

Any thoughts?  Do you see a Bikini Sizzler in your future?  (I can't stop saying that, I think it's the coolest name for a dress.)

Wednesday, August 24, 2011

Summer Seersucker

Well, the mornings are getting cooler and the nights are getting darker earlier and earlier.  This just might the last of this year's summer projects for my niece.


I used a couple of different patterns to put together a cute three piece outfit to see out the last warm days of summer.


She was in a bit of a goofy mood when it was picture time and it took awhile before I could get her to do some model poses for me.


Here's a close up of the fabric.  Can you see that slip of shiny silver thread that runs through it?  That's what drew me to the fabric.  She kept saying "It sparkles!!"


Here she is with the little caplet or bolero, whatever you want to call it:


And now you can see the little tank underneath with straps that match the pants.


She was still being slightly goofy for the 'serious' shots, but she's only 4 years old so that's allowed, actually it's encouraged.  If only we could all be 4 years old again~


Monday, August 22, 2011

CELEBRATION: Plaid Giveaway!!

Come on...get down!


You guys know that I don't do giveaways very often but to celebrate my one year blogging anniversary I knew I had to do something special....and Plaid agreed!  So they're sponsoring a great giveaway!


Confetti, Champagne, Fuchsia, Royal Blue, Aqua.

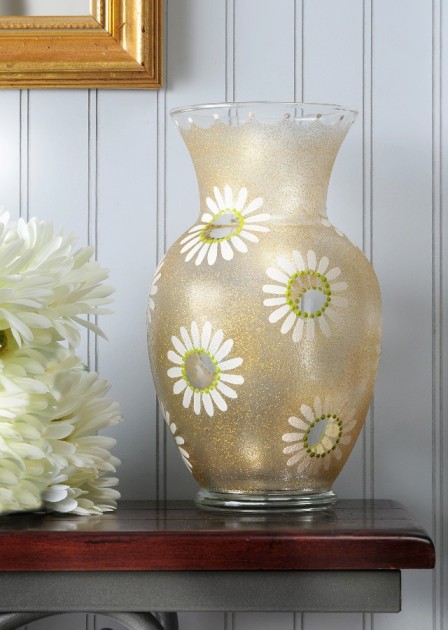
I'm so excited to feature their new Extreme Glitter FolkArt Paint Colours!  Don't they look great?  And you could win a prize pack that includes all five new colours you see above!

Here are some fun project ideas from Plaid's great blog, Paint me Plaid
  
            Extreme Glitter Gold Glass Vase
Pretty Vase
Easter Eggs!
 
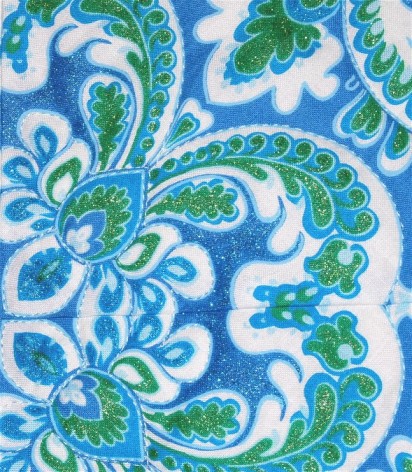
Paint some fabric!

If you're a Google Friends Follower of Etcetorize you have two chances to win (just hit that button on my sidebar if you haven't already):

1) Leave a comment to let me know that you're a follower

and

2) For an additional entry, leave a comment telling
me what you'll paint if you win this great prize~

Easy peasy!  Contest is open until August 31st and you can enter no matter what country you live in~ 

If you have your comments set so that I can't email you back and your address isn't accessible through your google friends profile, make sure to leave your email address in your comment otherwise I have no way of getting in touch with you.  (Just write out your email like this:  etcetorize (at) yahoo (dot) ca.  I think that helps to avoid getting spam~)

Good luck everyone and thank you Plaid for this great giveaway!

This giveaway is now closed.  Thank you to everyone who participated~

Friday, August 19, 2011

One Year Anniversary!!!

Wow, I can't believe I started all this up a whole entire year ago!  Blogging has been such a fun adventure.

I originally started up Etcetorize the blog to send people to Etcetorize the Etsy shop but I ended up having so much fun with the blog that it sort of took over everything.

I used to be soooo very careful about my web presence and didn't really participate in anything online.  Now I have a blog, two online shops, I'm active and have been featured on Burdastyle, submit pattern reviews regularly on patternreview.com, and feel like I'm really a part of the blogging community.

I've always been a sewer and crafter but until I started to keep track of it all I had no idea just how much I do.

So, after an entire year of tutorials, inspiration photos, show and tells, features, and more, I'm going to take the day off and share the top ten posts over the past year.  According to Blogger Stats, the top 10 posts are.... 

#1 most visited post
DIY Paper Jewellery
With a bit of Dimensional Mod Podge and scrapbooking paper you can make your own jewellery!

DIY Paper Jewellery, Paper Jewellery, Paper Crafts, DIY Jewellery, Mod Podge

#2
Spool Knitter
First I showed you how to make your spool knitter...

DIY Craf, Spool Knitting, Spool Knitter, DIY Spool Knitter, Knitting, Easy Knitting

#3
Spool Knitting
And then I showed you how to use it...
DIY Crafting, DIY Spool Knitting, How to Spool Knit, Knit Scarf, Spool Knitting

#4
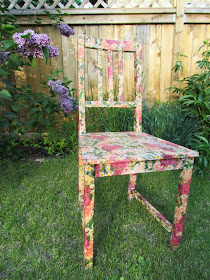
Mega Mod Podge
Thanks to everyone from Mod Podge Rocks, this Mod Podged chair suddenly flew up the popular posts list just this month!
DIY Craft, Mod Podge, DIY Mod Podge, Mod Podge Furniture, Mod Podge Chair, Decoupage, Decoupage furniture

#5
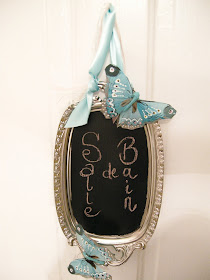
It's a Sign
One of my personal favourite projects were these pretty chalkboard signs.

Chalkboard paint, chalkboard sign, DIY Chalkboard, Silver Tray reuse, Silver Tray sign

#6
Summer Maxi Dress
I'm a little surprise this was so popular but I guess everyone was in the mood for some summery fashions.

maxi dress, boho dress, boho chic, summer dress, long dress

#7
Calendar Art 
This was one of the very first projects I posted!

Shoe Calendar as Art, DIY Art ideas, Shoe Art

#8
Royal Wedding Hats
I think it's quite funny that this random post ended up in the top 10 but there it is~

Royal Wedding Crazy Hats


#9
Coffee Table Recycle
Once in awhile I get very industrious and tackle furniture projects.

Coffee Table Recycle, DIY Bench

#10
Shabby Chic Bracelets
Another one of my favourite Mod Podge projects!

Shabby Chic Bracelet, DIY Bangles, Lace Bangles, DIY Jewellery

And I'm going to add one more of my favs...the project that started it all...

Garden Gazing Ball


Thanks for a fabulous year of crafting, sewing, and all round fun everyone!  You can check out the other 40 tutorials here, the other 42 Show and Tells here, and don't forget the Inspiration Shots here .  It's your positive comments, ideas, and questions that keep me creating.  I appreciate all of you more than you'll ever know.

I don't do giveaways very often but I have a special surprise for all of you next week to celebrate the big one year mark.  Make sure to come back and check it out!

Super huge thank you everyone!