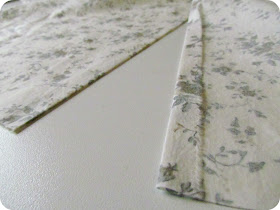
I picked up two of these pretty linen pieces at the thrift store a couple of months ago. I'm not really sure if they're actually placemats but they're about the right size. There's no way I'm eating on pretty hand embroidered linen though. I'd be bleaching till the cows come home. So....pillows they will become!
Materials:
linen placemats
thread
cotton for backing
cotton for pillow liner
batting or stuffing (I used old pillows)
tape measure
iron
sewing machine
Steps:
1) After pressing all of your fabrics, fold your pillow backing with wrong sides together. Fold your placemat in half and align it with the selvedge of your fabric but in about 2 3/4".
2) Cut your fabric around the outside of your placemat, ensuring a hem of at least 5/8".
3) Fold over the straight edge approximately 5/8" and press. If you weren't able to use a selvedge edge, finish the edge with a narrow hem.
 |
| You can sew this down if you want, but it's not necessary. |
5) Place your fabric on top of your placemat. Fold and press along the edge to create a hem.
6) Pin your fabric to your placemat, one side only. VERY IMPORTANT: place wrong sides together. We will not be turning anything so make sure your wrong sides are together.
7) Sew as close as you dare to the edge.
8) Repeat, placing the second side of your backing down, overlapping the straight edges.
9) And there you have it! Two wonderfully flat but pretty pillows!

KIDDING. Now we have to fill them with something. You could go out and buy pillow forms, but the odds of you finding something the same size as your placemats are pretty low. Besides, pillow forms are a bit on the pricey side considering no one every even sees them.
First up is something to hold your pillow inside of the case.
10) I found some very inexpensive brushed cotton in a neutral colour in the bargain bin. Just trace along the outside of your linen pillow case with a generous hem.
11) Cut and sew together. This does not have to be pretty. Absolutely no one will see this, so I just serged my edges together.
Next, I dug into my closet FULL of pillows. Yes, I have a closet of pillows. I was having major neck and shoulder problems and tried pillow after pillow, each one fluffier or more sturdy than the next. Eventually I figured out that the only thing that works is one of those stupid molded foam wave pillows. Not pretty, but at least I can sleep now. Anyhow....
10) Open up your pillow. I was very surprised that the first one I opened up was nothing but a quilt batt inside.
The second one had little foam chips.
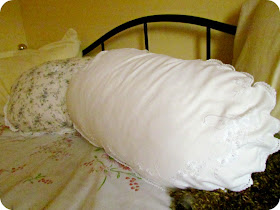
12) Fill your pillow form and serge closed. Place your pillow form inside your pretty linen pillow case.
 |
| Wish I had an embroidery machine to monogram the centers~ |
Before:
 |
| Just random pillows I had, that don't go with anything. |
It's a work in progress, but it's getting there.
Big thanks to my special helper, Katya.
"Nothing is so fatiguing as the eternal hanging on of an uncompleted task." ~William James
Do you have any projects you're putting off for no good reason? What do you do to avoid procrastination. Share your ideas below...I need as much as help as I can get~
Have a crafty week everyone!


BEAUTIFUL! I've been putting of lots of mini sewing projects... maybe this is finally the weekend to attack! Thanks for sharing,
ReplyDeleteExcellent tutorial. Lovely pillows.
ReplyDeleteThese were originally dresser scarves.
ReplyDeleteWonderful pillows! Love them!
ReplyDeleteWhat lovely pillows Tamara!
ReplyDeleteI put so much off - let me know when you find the secret to stopping the procrastination!!!:)
Thanks for linking to a Round Tuit!
Hope you have a fabulous week!
Jill @ Creating my way to Success
http://www.jembellish.blogspot.com/
They look so pretty on the bed! Wonderful tutorial.
ReplyDeletenew follower :)
Thanks for linking up to our Sunday Round Up link party. Hope to see you again this weekend :)
xoxo
Heather
Very pretty! I'd love for you to add it on my link party at: http://printabelle.com/?p=3188 Thanks!
ReplyDeleteI have so many projects I'm putting off, ah well. I love your pillows and your little helper is pretty adorable too, lol.
ReplyDeleteI love pillows that are a different shape. Great tutorial! I love the look of linen placements as pillows. It's a good thing Katya was there to help:) Just hopping over from These Peas Taste Funny and am now following you. Would love to invite you to link this post to my first ever blog hop:)
ReplyDelete