

I didn't really know what I was doing out here in blogland but I felt like I really had to share that project for some crazy reason. And now, almost 2 years and 400 posts later, I'm still here! Yay!
So, I was motivated by next month's Motivated Monthly party (Garden Projects), a bit of nostalgia, and a larger light fixture and redid my project from two years ago.
Here's all you need:

Steps:
1) Wipe down your light fixture so that it's clean and dry.
2) Paint a small portion of your light fixture with some Mod Podge.

3) Adhere your images, (I'm using leftover butterflies from my Butterfly Overload project) adding a layer of Mod Podge over top as you go.
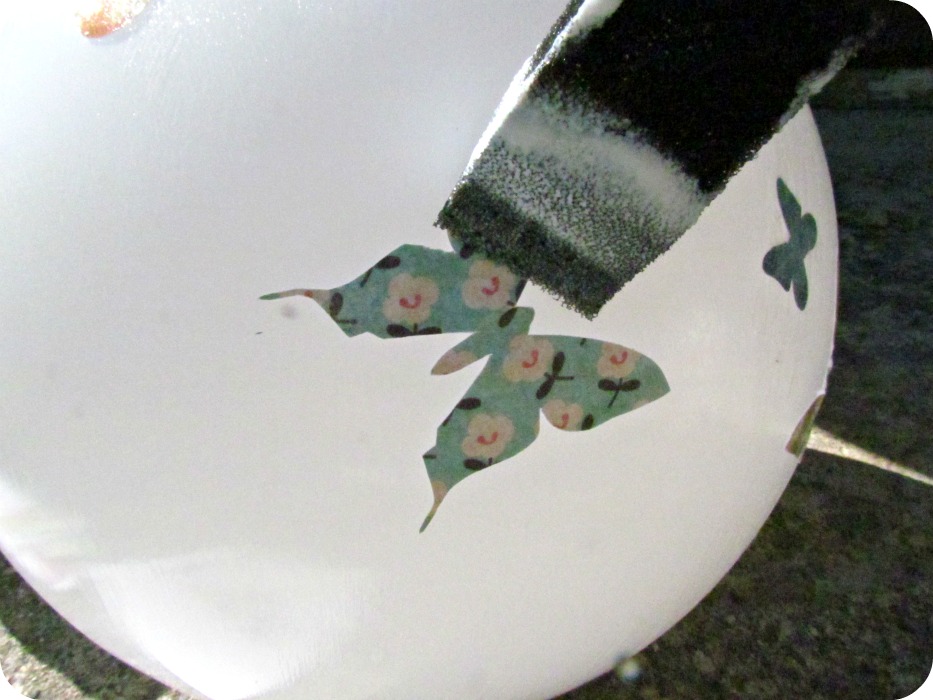
4) Keep going around your whole fixture until it's fully embellished.

5) And now for the fun part! Add a second layer of Mod Podge using SPARKLE Mod Podge to seal in and protect your images from any cold wet weather, and to add some sparkle that will catch the rays of the sun.

I didn't do this step with my first globe but I sure wish I had~

There you go! That's it! Once it's dry....set it out in your garden or flower bed!

I haven't done this but if you're having an outdoor get toegether I think it would be pretty if you put a light inside and line up a whole bunch of them! Maybe those battery operated tea lights?

That's it! It was easy the first time and even easier this time! Make sure to check out the original post and let me know what you think. Am I getting any better at this blogging stuff?
Happy crafting everyone!
This project was featured here:


How pretty! I like the butterflies. I agree that a bunch of lit up balls would look sweet for a party.
ReplyDeleteI was one of your very first followers and yes I remember that beautiful gazing ball! I think this is project I might attempt this week. It's so gorgeous! With kiddos around I may have to figure out a way to hang it from a tree... you know... hockey sticks and soccer balls.. yikes. Let you know how it turns out! Thanks for 2 years of truly inpirational posts!
ReplyDeleteI'm a Mod Podge maniac, and I love your project! I will give it a try this summer.
ReplyDeleteI love your gazing ball! This would be a neat project for the summer -- I know just the butterflies I'd use. Thanks for a great tutorial [way back when]. ;-)
ReplyDeleteThat looks cool...New follower from lines across. Love for you to follow back when you get a chance and link up to Mom's Monday Mingle. It is live now ;)
ReplyDeletehttp://naptimeshopper.blogspot.com
very cute idea - I see these shades all the time at the thrift- this would make a great vbs project too
ReplyDeleteThis is absolutely wonderful! I am going to try it :)
ReplyDeleteThat is pretty!
ReplyDeleteI saw this at the Ginger Snap Crafts link party. Thanks for sharing.
ReplyDeleteWow! Love this, please share it! Perfect for my readers. Link it up with me on my Wow Us Wednesday, ok? Over at www.familyhomeandlife.com
ReplyDeleteWhat a lovely idea for an old light fitting - and yes it would be fabulous with little lights inside!
ReplyDeleteThanks for linking to a Round Tuit!
Hope you have a fabulous week!
Jill @ Creating my way to Success
http://www.jembellish.blogspot.com/
Well, it's a toss up. They are both really cute! But I love glitter so this one wins!!!
ReplyDeleteSo pretty and thrifty too! I can see using the solar path lights (cheap at Walmart and Dollar Tree if you can find them this late in the season) to light them up for a party!! I'd love it if you came by and shared this at my party going on right now at
ReplyDeletehttp://www.kathewithane.com/2012/06/youre-gonna-love-it-tuesday-week-7.html
I kind of collect the light fixture globes and put them in my flower beds, too. I take a solar light and push it all the way into the ground, or all the way down into the center of a big pot, then put the cover back over it. Voila'! Lots of interesting little lights! The butterflies would be so cute with a light on the inside.
ReplyDeleteBlessings--
Dana
Love it and am featuring it on this week's A Crafty Soiree. Thanks for linking :)
ReplyDelete