If you've just had a manicure I suggest you get out some rubber gloves because this one is going to get a little messy.
Here's what I used for this project:
 |
| I always forget one thing for these supply photos (sigh) in this case it was scissors, they'll come in handy when you need to cut your lace~ |
1) Tear or cut your napkin in half.
2) Take one large, tacky, gaudy, and quite ugly bangle and smother it with Mod Podge
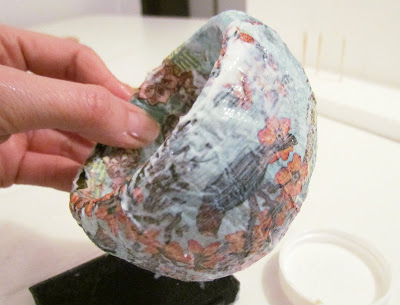
3) Smoosh one of your 'half' napkins on top and wrap it to the inside
4) Don't worry if at first it looks crazy messy, because now you're going to start smoothing it out, tearing away excess paper, and adding to any spaces that are bare
5) And if you've ever Mod Podged before, you know what's next....throw another layer of the stuff right on top of your newly smoothed out napkin
 |
| getting messy! |
 |
| Messier! |
 |
| Really Messy |
7) Once you've got it secured you can add another layer of Mod Podge on top of the lace, making sure to secure the edges of the lace down.
 |
| Please ignore my brush, it was the only one I had left. This will work much better if you use a normal sized smaller sponge brush. |
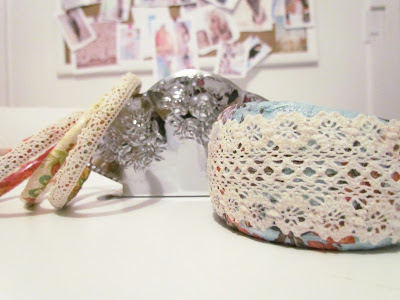
You can see, I did some smaller bracelets too using a contrasting peachy napkin as the base. These are the same napkin's I've used for everything from covering pencils to coasters and picture frames to Easter Eggs . I left one of the smaller bracelets without lace just to add something different to the mix.
Voila! Some shabby chic bracelets!
What do you think? I love it when something so ugly turns into something sooooo pretty!
As always, check out the linky party page. So many great ideas, just a few clicks away!


25 comments:
Nice little project-I love those little bangles in the background. (last photo).
Question-Is the inside of the bracelet scratchy from the glue?
I was a little worried about the scratchiness factor too, but they're fine. You could glue some nice velvet ribbon to the inside to make it extra soft though. That would feel quite nice actually~
I love this Mod Podge FUNNN..how smart..very cute..love the detail :)
LOVe these~!!!
Really really lovely! I've been planning to make something very similar myself - hopefully you're the force that makes me move :D
These turned out so pretty! I have a bangle I need to recover. Thanks for the inspiration. :)
justenoughstyle.blogspot.com
Amei teu blog!!! amo costurar,já estou te seguindo,acho que sou a primeira brasileira por aqui...
beijos
I love handmade jewelry! your bracelet turned out beautiful!
-Linds
Delighted Momma
CUTE!
I just started a linky party this past Tuesday. It was a great success with over 50 link ups! I would love it if you would participate next week! It's called $10 Tuesdays and it's for things that cost less than $10 and take 20-30 mins (ish) to complete. I love inexpensive and quick projects and I'm guessing others will too ;) Thanks so much for considering.
Tina
http://sweetfloweret.blogspot.com/
PS. I'm GIVING away 50 button pony tailers this month! Come visit and claim yours ;)
Thanks for all of the lovely comments everyone! Ana... Receba a Etcetorize!
I was going to ask about the inside too, but then I know from other projectes I've done, the paper all overlaps so you wouldn't feel anything on the underneath side.
Love the paper you used and the crocheted edging gave your braclets a special touch. Thanks for sharing your project with us.
These are gorgeous!
Very cute! Love it!
Cute idea! Come and join my linky party: http://fabricbowsandmore.blogspot.com/
Love this. I made a bracelet a few days ago, and now I'm hooked on making them. I'll be trying this one for sure! Thanks for posting it in an easy to understand tutorial.
You're more than welcome to link up at the Sunburnt Cow link party.
Cheers,
Tracy All Thumbs Crafts
such a great idea!!!!
Oh I like the bracelets very much I wear bracelets everyday
Never thought of modge podging bangles! Thanks for the tip. Found you via Blue Cricket Design :-)
I like the layering and how many different things you could do with different materials!
Very very chic upcycles! Isn't mod podge amazing?
-caroline @ c.w.frosting
This is a great idea for turning a tired old accessory into something cute. The lace is pretty, but I love the pattern on the napkins alone, too.
so fun! love the fabric and lace together
Thanks for linking up to Your Whims Wednesday! Hope to see ya again this week :)
So simple, and so creative!! Love this!! Such a great idea. Definitely going to have to make some of my own with my scrap fabric laying around!
This is great! I have been wanting to do something like this! I would love if you linked this up to my Make it for less party! It goes on every Monday at www.Simplycadence.blogspot.com
Post a Comment