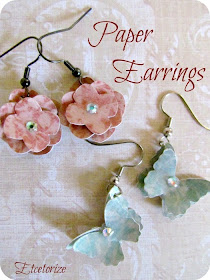
Here's what you need to make your own pretty paper earrings with things you might already have in your craft closet:
Materials:
-pretty medium to heavy weight scrapbooking paper
-Dimensional Mod Podge
-Glue gun or other adhesive
-small hole punch and needle nose pliers
-shepard hook earrings tops
-small rhinestones or other embellishments
Steps:
1) I let my Silhouette cut out my hydrangea shapes with the biggest of the 3 shapes only 3/4" wide.
If you don't have a Silhouette you can still do this project. As you can see it's a very simple shape that just gets progressively smaller.
2) Coat all of your petal pieces with a nice thick layer of Dimensional Mod Podge.
I love this stuff because it dries clear and looks and acts a lot like resin without all the mixing. You can get as close to the edge as you want and it shouldn't fall off.
3) Before you walk away to let everything dry overnight stick a little rhinestone (or better yet a Swarovski crystal) right in the middle of the smallest shapes.
Let the Mod Podge dry overnight making sure to shift your pieces a little about an hour or two into it to ensure that none of them are stuck to your table below.
4) Now you can do what I did and skip right to the next step but I don't recommend it. You can see in the photo where I had to unglue my pieces to get the paper to fit the hole punch. So just punch your holes now and save yourself the aggravation.
5) Now add the smallest dab of hot glue onto the middle of the largest shape and start stacking the other shapes on top, rotating as you go to make sure we can see all of the petals.
6) Using your needle nose pliers attach the shepard hooks. You can add jump rings if you want to in between, I just didn't have any the right colour so I went straight to the hook. (I'm determined to use up my massive stash of jewellery making supplies without adding to it)
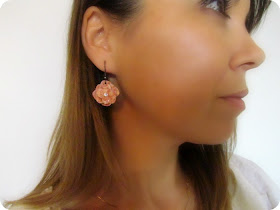
Tah Dah! You've got yourself the prettiest pair of earrings on the block!
I like them so much I made another pair in a different shape....butterflies, of course!
I wish you could see how glossy they are. They look just like resin covered ceramic but they're just paper!
This is really just a twist on my original paper jewellery that I made ages ago. You can also see the necklace I made from paper here.
What do you think? Are you a diamonds only kind of gal or could you see yourself sporting a pair of paper earrings? Leave a comment below~


Adorables !
ReplyDeleteAnna
Those are super cute! Did you do anything to seal the paper on the back?
ReplyDelete~Kelsy
http://looseendscraftblog.com
So cute! I would love to see how you use up your jewelry making stash. I have a ton I need to use up.
ReplyDeleteThank you for sharing this cute craft. I have the butterfly punch, so I'm going to try for sure.
ReplyDeleteI've been meaning to make paper earrings for the longest time! I should just get to it! lol Thanks for sharing!
ReplyDeleteThose are really cute! Heaven knows I have enough scrapbook paper (and every other paper crafting thing) to make hundreds of these! But I'll probably just make one or two. :) Thanks for sharing!
ReplyDeleteThese are so beautiful and I love how simple they are to make! Pinning and definitely planning on making soon. I'd be thrilled if you'd come on over to Pink Recipe Box and link up at Creative Wednesdays: http://pinkrecipebox.com/creative-wednesdays-with-pink-recipe-box-3/
ReplyDeleteVery cool! I love them! I am going to share this post with my daughter. :-)
ReplyDeleteJust wanted to thank you for the excellent tute. I love the dimensional magic on paper, although I sometimes have trouble with it clouding up on top of a photo. I have to figure out what caused it to do that. Maybe it was on photo paper and that might not work. Thanks again. Just wish I had a cutting machine, so much easier!
ReplyDeleteHow Wonderful and no one else will have the same :)
ReplyDeleteGreat idea, thanks. These might be cool to add to my collage button necklaces :)
ReplyDelete