-pretty paper
-Mod Podge and sponge brush or your preferred adhesive
-large D ring
-cutting mat and craft knife or pencil and scissors
-hole punch or crop-o-dile
Steps:
1) Use your recipe cards as a template to cut two pieces of pretty scrapbook paper. These will be used as your front and back covers. You can either just cut right along the card or trace around with a pencil and then cut with scissors.
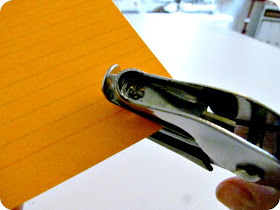
5) If you're really lucky and have a crop-o-dile I'm sure it would come in handy for this next step, but I don't have one (boohoo), so I'm just using a plain old school hole punch. Determine where your D-ring will be inserted and punch a hole.
Use that card as a template to punch the other cards. If you go off every once in awhile (like maybe I did), just switch out your template with a card that was punched cleanly.
Hopefully they'll all pretty much line up.
6) Starting with the cards you want at the back of your book just thread them onto your D-ring.
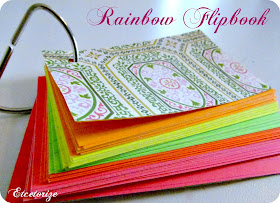
Voila! You're done!
Punching the holes wasn't anywhere near as labour intensive as I feared it might be. The whole thing was done within a half hour.
These are great books to use as flashcards when you're learning a new language, as a recipe stack, or just a plain old notebook.
What will you use yours for? Leave a comment below!


Such a cute little booklet. Love the rainbowness of it! :)
ReplyDeleteIt is cute, fun and colorful.
ReplyDeletePlease share your project at Pin It Monday Hop#7. See you there.
Judy
pursuitoffunctionalhome.com/
Cute idea! My daughter loves to have stuff like this around so it would be a perfect little gift for her.
ReplyDeleteThanks so much for linking this up to the Pinworthy Projects Party!