And I'm not going to tell you all about the great "Art from Gift Wrap" project I was going to do that went horribly, horribly wrong.
Instead, I'm just going to move onto simpler crafts that take no time at all and are virtually error proof!
Way back in April I saw this photo from Tara at JunkRestore . Tara puts on a Barn Sale every once in awhile with loads of other vendors who do shabby chic refurbished type work.
 |
| Someone referred to only as 'Pam'created these beautiful bird feeders/works of art. |
I kept the photo in my file of things to do and waited for the ice and snow to thaw so I could create my own.
Here are the supplies I used:
Next time you head to the second hand store just pick up some interesting vases, cups, saucers, plates, etc. Anything that looks pretty and catches your eye.
Steps:
1) Clean all of your pieces with some natural cleaner
2) While you're waiting for your glue gun to fire up, decide how you want to stack your pieces.
3) Just add a bead of hot glue along the inside edge and start stacking.
4) Glue and stack, glue and stack, until you feel like you have a finished piece.
It looks a little crazy inside, but wait till you take it out to your garden...
 |
| Tah Dah!!!! |
Isn't it pretty??? I put the plate in the middle so that I could put some bird seed there and maybe the cup at top will have rain water in it for a bath. Or I could put birdseed up there too.
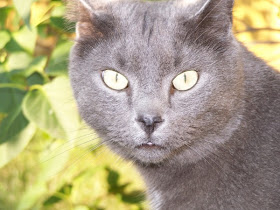
I know what you're thinking. Isn't this awfully low to the ground? What about Mr. Whiskers? Is this just an easy way for him catch and torture little birdies? No worries, Mr doesn't seem very interested in birds. And, what's more funny, is that he's not the most graceful cat in the world so birds hear him coming from a mile away. I'm confident that everyone will be safe.
 |
| Mr. Whiskers aka/ Monsieur or Mr. |
Oh! I almost forgot to tell you...this entire project took me about 10 minutes to make, maybe not even. I told you it was simple and fast.
Leave a comment and let me know what you think.
And don't forget, if you're a follower you can add your blog button to the "Follow my Friends"tab up top. Each month I post a feature on at least one new bloggy friend.
Happy crafting everyone!


I love this idea. We have cats that are a little more agile, lol, so I'm thinking it would be easy enough to attach a wire hanger to this. Great idea. Thanks so much for sharing.
ReplyDeleteThat is so pretty. Thanks for sharing. Have a great day.
ReplyDeleteI can't believe you made that, it's so cute and creative! Thank you for sharing!
ReplyDelete-Kelsey
atrueaggiestory.blogspot.com
Very pretty! Now all I need is a garden... :P
ReplyDeleteLove it, love it, love it. At my house it will be a squirrel feeder that will need a wide base, but this project is in my list.
ReplyDeleteSo nice to hear someone else's projects go wrong, too. I thought I was making a strap to hold my pant leg away from the bicycle gears yesterday, but it, too, went horribly wrong. Try, try again, right?
That is so nice looking. I would definitely make it if it wasn't so windy out here. With the winds kicking up to the 50's, I never put anything outside if it is breakable.
ReplyDeleteThis is really a cute idea!! It does look great in the garden! I have some neighborhood cats that can't be trusted....but even doing something like this just as garden art would be awesome I think. :)
ReplyDeleteWhat a great and easy tutorial! Plus the possibilities are really endless, and a little recycling is always welcome.
ReplyDeleteVisiting from Serenity Now
Does the hot melt glue work for you? I have made hanging versions using epoxy as it seems to be the only thing that holds up over time outside, Montana winters, etc. Never tried hot melt glue though! Thought gorilla glue was the answer, and it isn't!
ReplyDeleteThere is a lady on Facebook/etsy that makes these as hangers, they are beautiful. The only problem I could see with your pretty piece is that it's likely to be top heavy and you could put some sand or gravel in the bottom bowl before you glued the top on. Very pretty though.
ReplyDelete