This is a project that I've been putting off for way too long. Like anything that we procrastinate about, in the end it was painless and I'm so happy that I've finally made the change.
I moved into a 'new' house two and half years ago. And when I did, I changed the colour scheme of my studio. It used to be lovely shades of blues and ivories in floral and paisley patterns. Now it's pure white with a few splashes of hot, hot pink.
Everytime I need to use my ironing board, which is almost every day, I cringe at the sight of it. I started looking for a new cover 2 years ago that would match the rest of the decor but I have yet to find a hot pink cover that fits the board.
I know, I know, I can already hear you saying "Tamara....you're a sewer aren't you? Why don't you just make one????" Good question.
My excuse was that because I didn't want a seam across the middle of the board that it would take alot of fabric, so economically speaking I thought I'd be further ahead by just buying one. But after patiently waiting for the past two years, I had to admit I was just avoiding it for no good reason at all.
So, finally, at long last, my quest for the perfect ironing board cover has come to an end! I found some nice pink cotton fabric for a steal and I even bought extra so that I can make other matching items for the room. (Note, if you plan on doing this project, you should pre-wash your fabric and if you're really nervous about colourfastness add a little salt to your wash water.)
Of course, it was the easiest thing in the world and requires very little sewing.
1) Lay out your fabric and trace the shape of your ironing board onto the wrong side, giving yourself an extra 3.5 inches to fold underneath.
I have a great little tracing wheel with chalk that I used to mark 3.5 inches but you can use anything. If it leaves a mark it will be on the underside of the board and who goes down there???
2) Cut your fabric out.
3) If you have a serger, serge the edges. If not, either zigzag or just fold under.
If you're really a perfectionist and you're still worried about people going underneath and seeing an unfinished hem you could always use bias tape to bind the edges.
4) Make a narrow casing all around the edge. Sew a simple half inch seam all the way around, leaving a small opening at the straight end of the board to pull your lacing through.
5) Measure a piece of ribbon, string, or elastic that will be several inches shorter than the length of the casing. I had some hemp string left over from my jewellry making days so I just used that.
Pin a large safety pin to the end of whatever type of string you're using and thread it all the way through the entire casing.
6) Now just place your cover onto your ironing board, make sure there are no creases, and pull the string as tight as you can and tie tightly
Voila! That's it. I left my old covers on underneath to give it some padding and to ensure that I don't accidentally heat up the metal frame underneath.
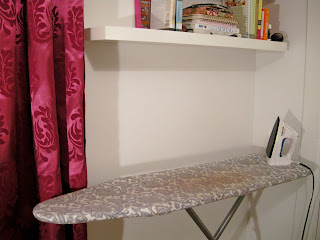 |
| Old Cover |
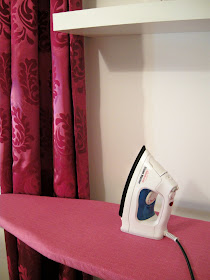 |
| Tah Dah!!! |
Doesn't that look so much nicer? The whole project took less than a half an hour! I have no idea why I put it off so long.
What do you think? Do you like before or after? Are you going to go for it and add some pizazz to your ironing routine? Let me know.
(This project was posted on all of the linky party sites on the linky tab above)
